
Scene Settings
On the Scene page, configure the starting position, navigation mode and skybox. Select the intended LiSplatActor and assign its Splat Asset before making changes.
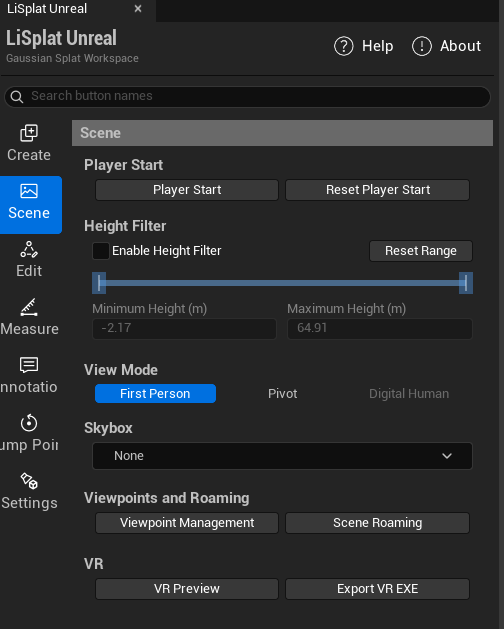 Figure: Scene settings panel
Player Start
- Click Player Start to create or select the spawn point.
- Use the Move and Rotate tools to place and orient it for the initial view.
- Reset Player Start returns it to the Gaussian data origin.
- Save and run the level to check the starting view. When using character collision, avoid placing the spawn point below the ground or inside a wall.
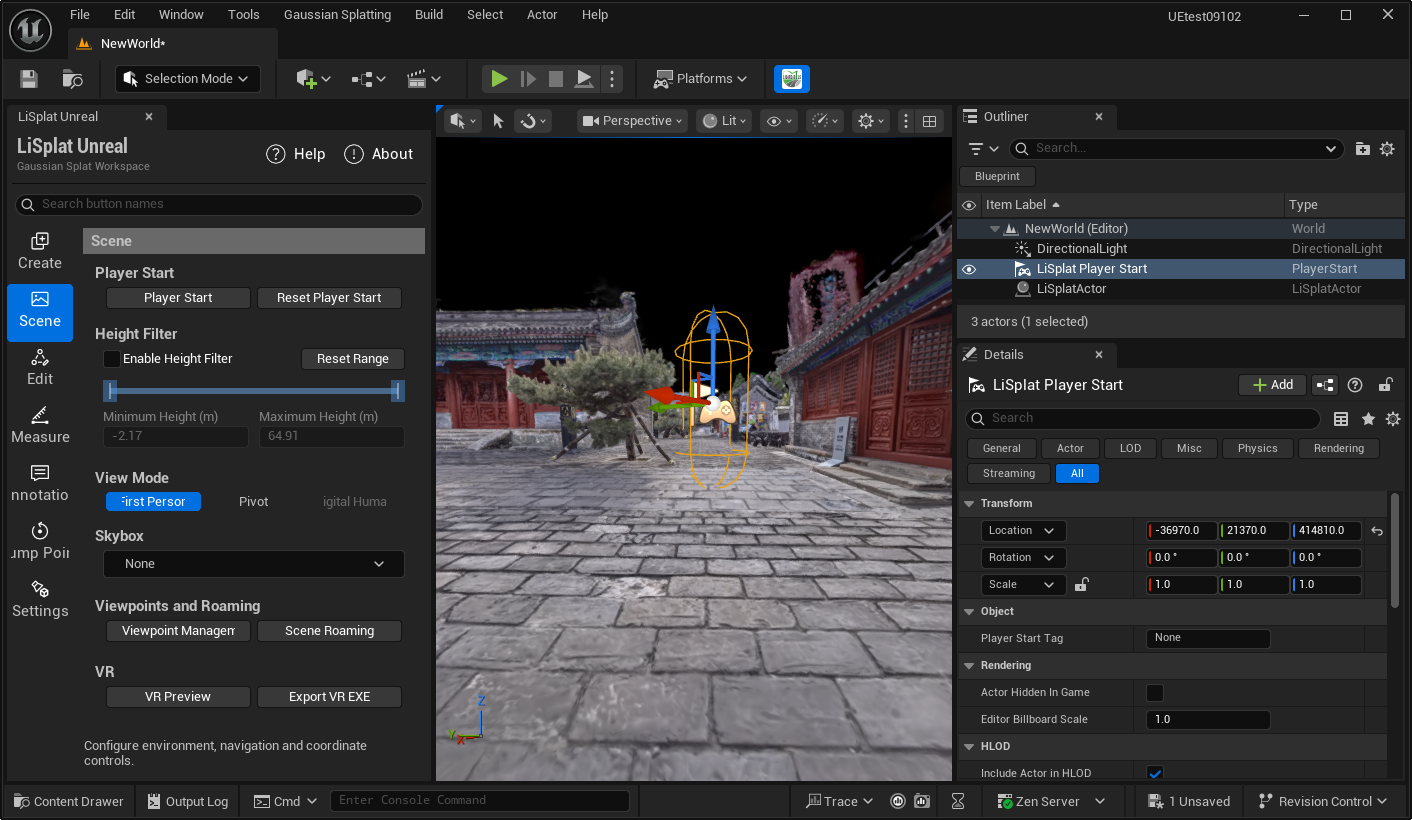 Figure: Configure the player starting position
Height Filter
Set minimum and maximum heights under Height Filter to hide data outside that range, for example when examining a floor or elevation band. Reset Range restores the full range. This setting controls displayed coverage.
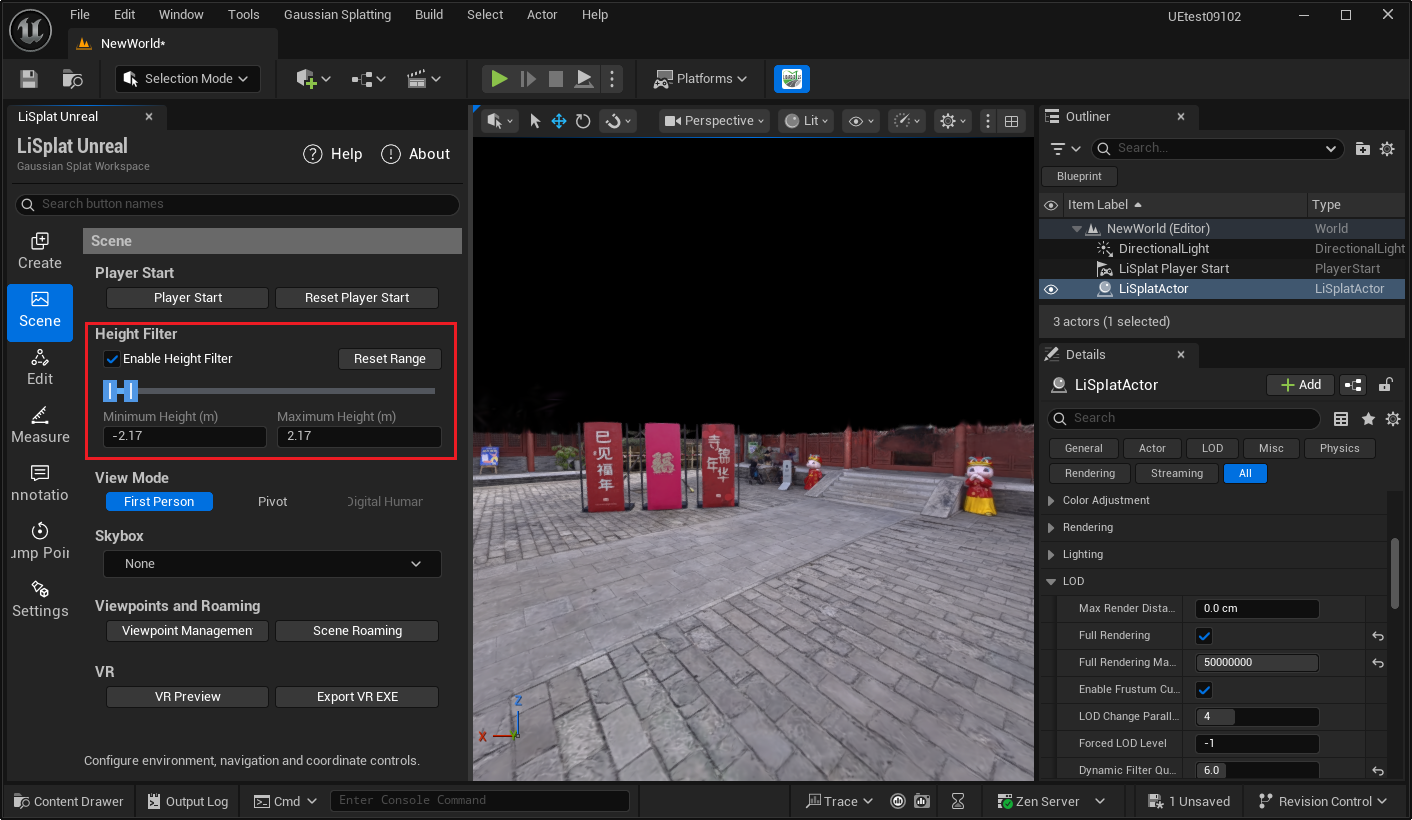 Figure: Height filter range
Navigation Modes
| Mode | Usage |
|---|---|
| First Person | Freely explore the scene; see Navigation and Transforms for controls |
| Pivot | Orbit the Gaussian focus: left button rotates, right button pans and the wheel zooms. Useful for inspecting exteriors and details |
| Third Person | Explore using a character. For ground blocking, generate and enable collision, then check the spawn position |
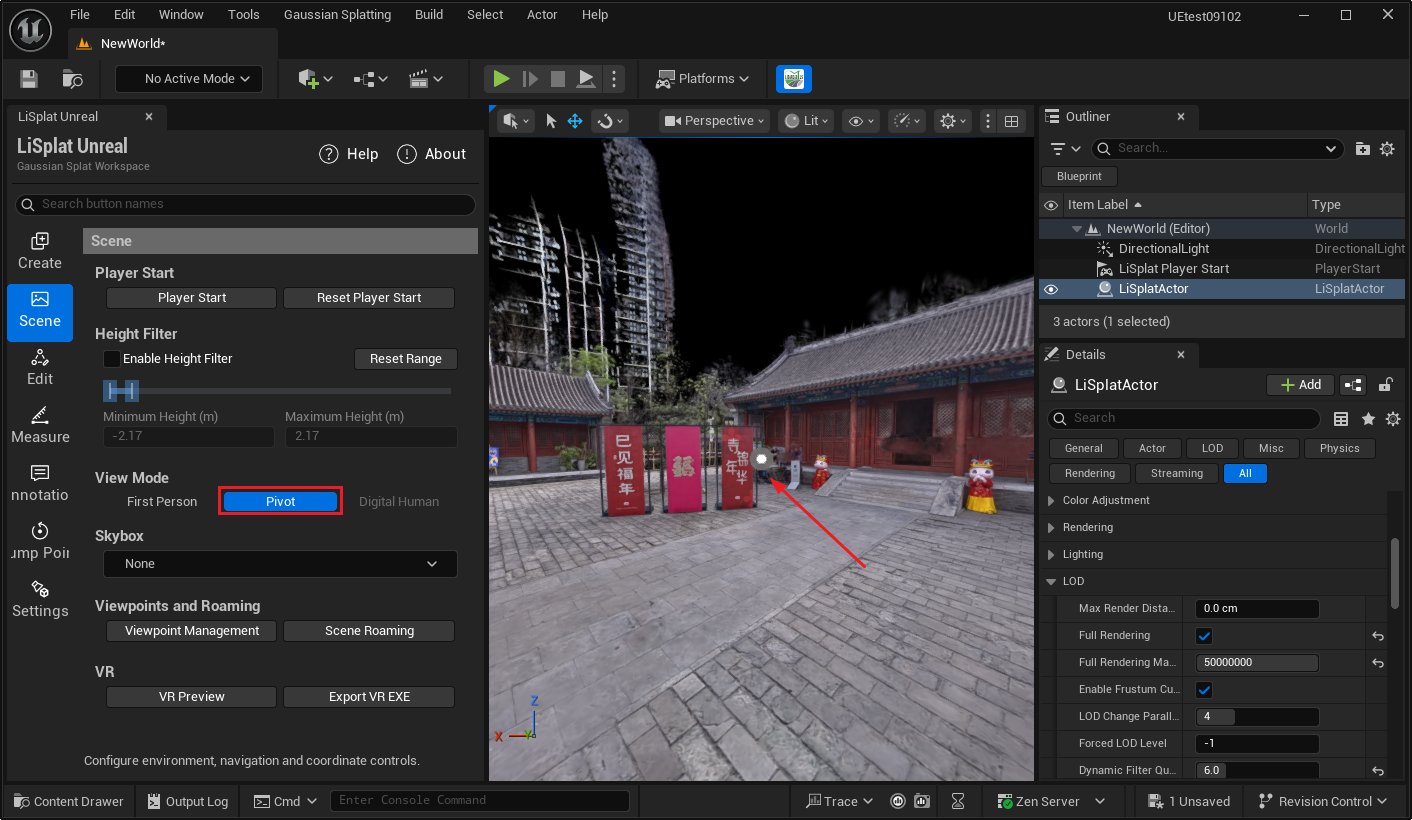 Figure: Pivot navigation
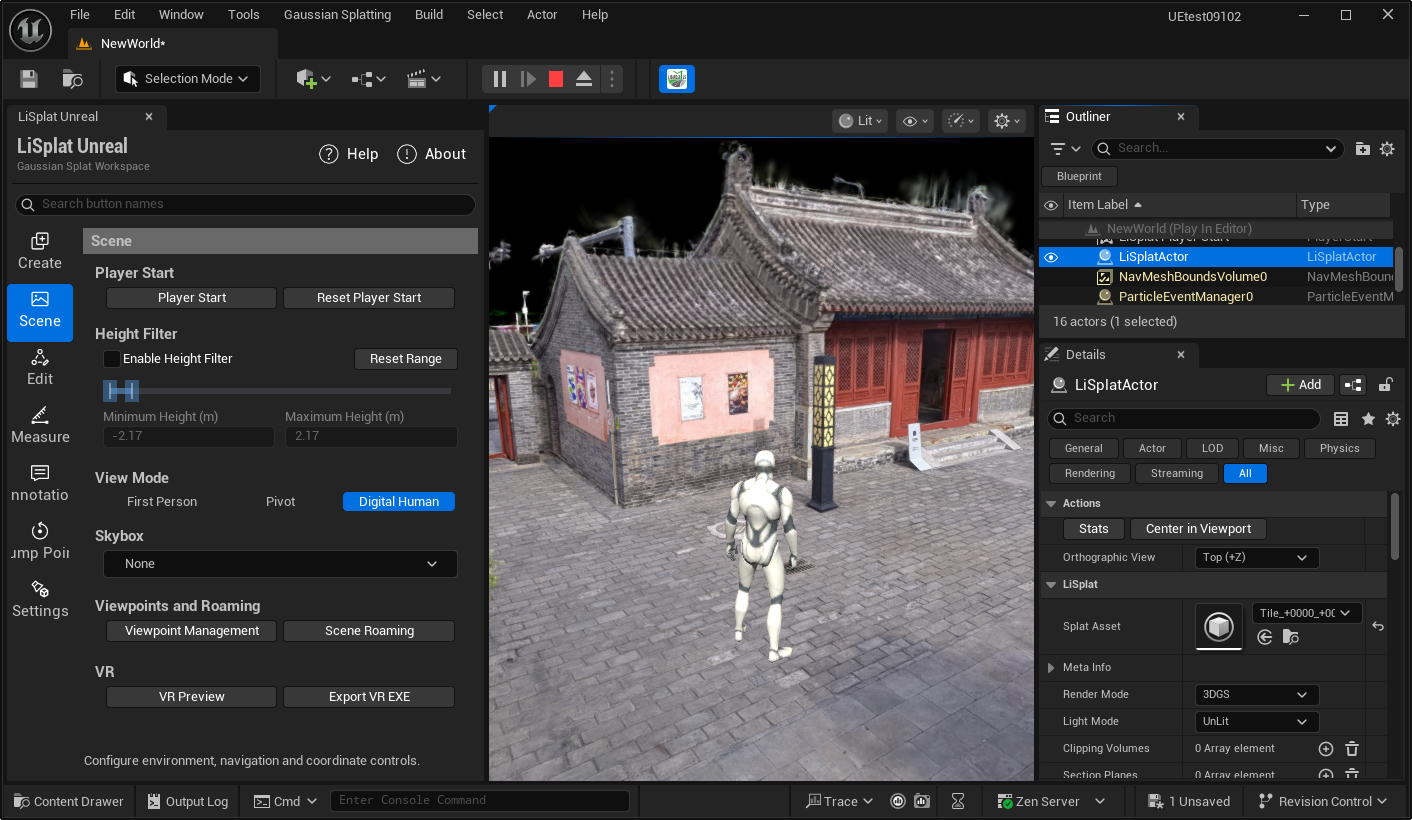 Figure: Third-person navigation
Skybox
Select and apply a background under Skybox. Check its direction and the overall scene appearance, save the level and run it to confirm the result.
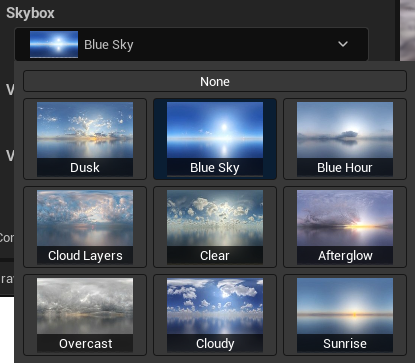 Figure: Skybox settings
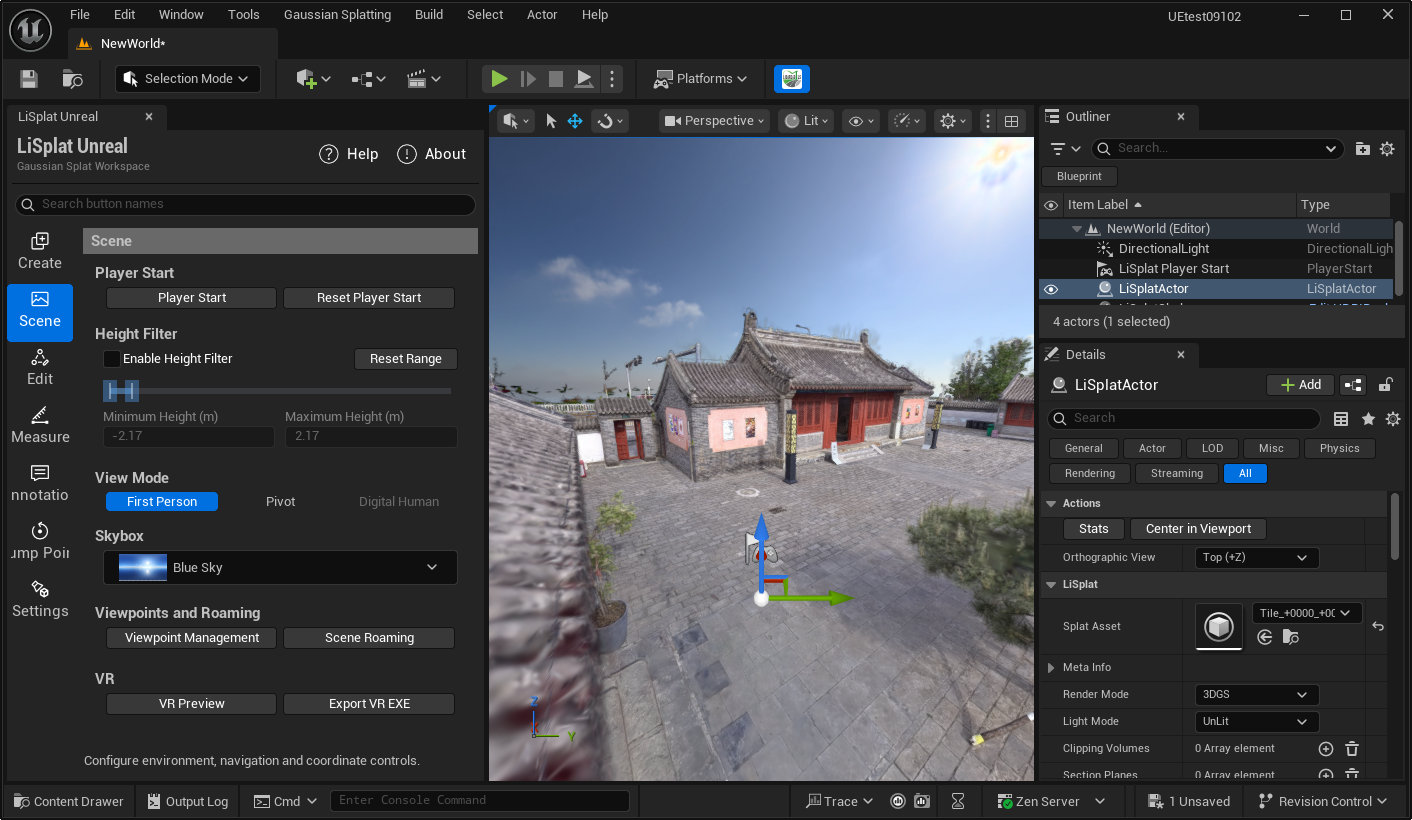 Figure: Scene with the skybox applied
Use Viewpoints to save viewing positions. Use Scene Flythrough for a camera path controlled by time.
Viewpoints
Viewpoints save camera position, direction and field of view for revisiting locations or organizing a presentation. Open Scene → Viewpoint Management, then select Guided, Roaming or Area Viewpoints.
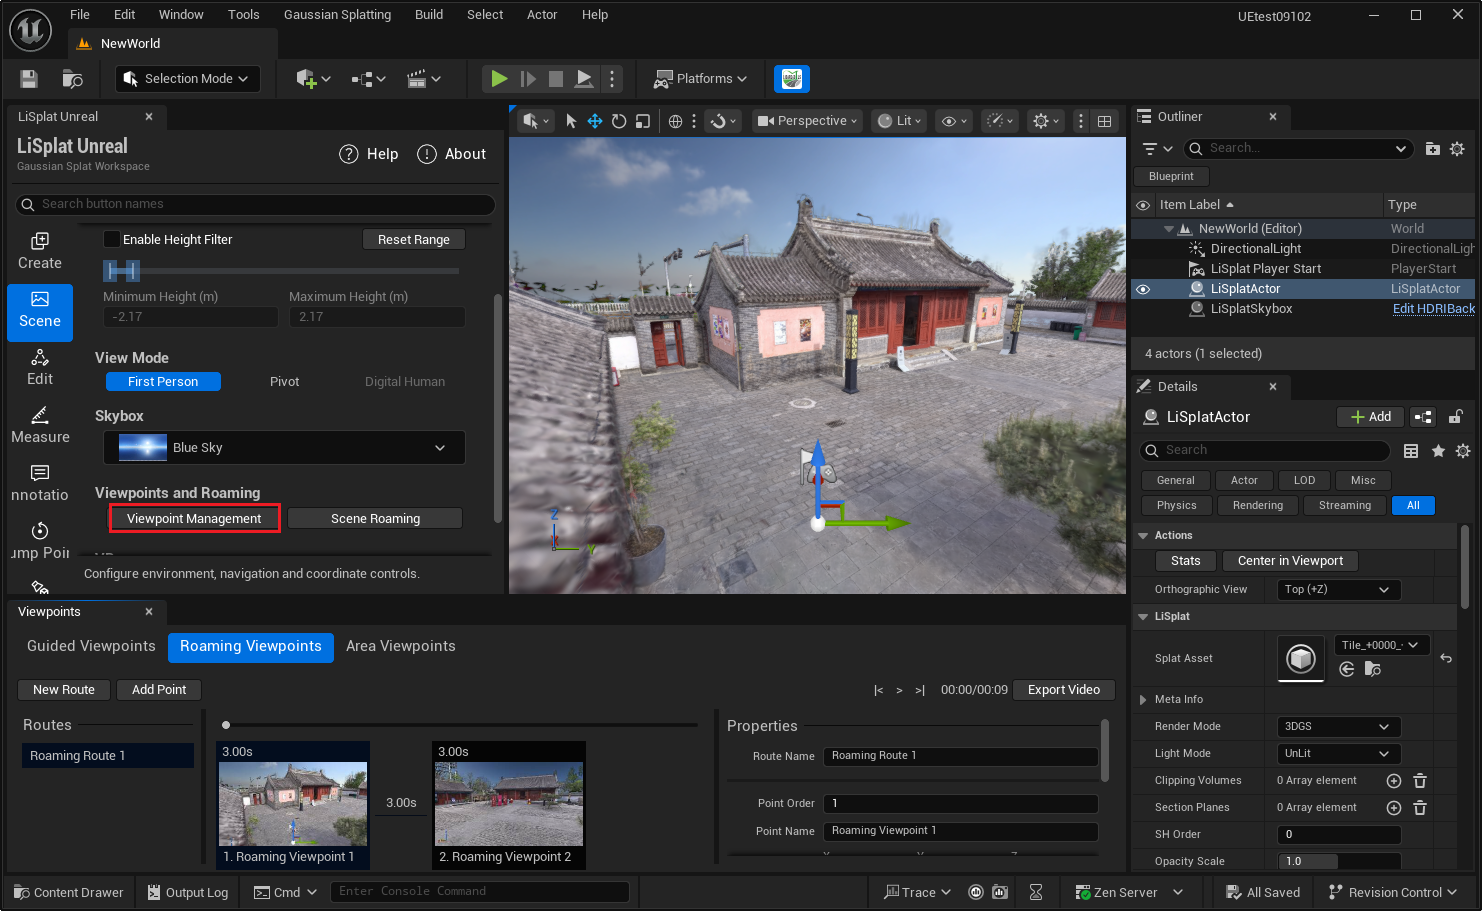 Figure: Viewpoint management
Guided Viewpoints
- Move the viewport to the position to record and adjust the viewing direction.
- Select Guided Viewpoints and click Add Viewpoint.
- Select the thumbnail on the left and edit its Properties on the right.
| Parameter | Usage |
|---|---|
| Point Name | Changes the name shown in the list |
| Position | Adjusts the point's X, Y and Z coordinates |
| Title | Sets the display title |
| Introduction | Adds information about the point |
| Camera Motion | Selects static, pan, orbit or another camera motion |
| Motion Angle | Sets the motion angle in degrees |
| Lock Point | Keeps the camera aimed at the recorded focus point |
| Apply Settings to All Points | Applies the current settings to other points |
Preview the viewpoint and check its position and camera motion.
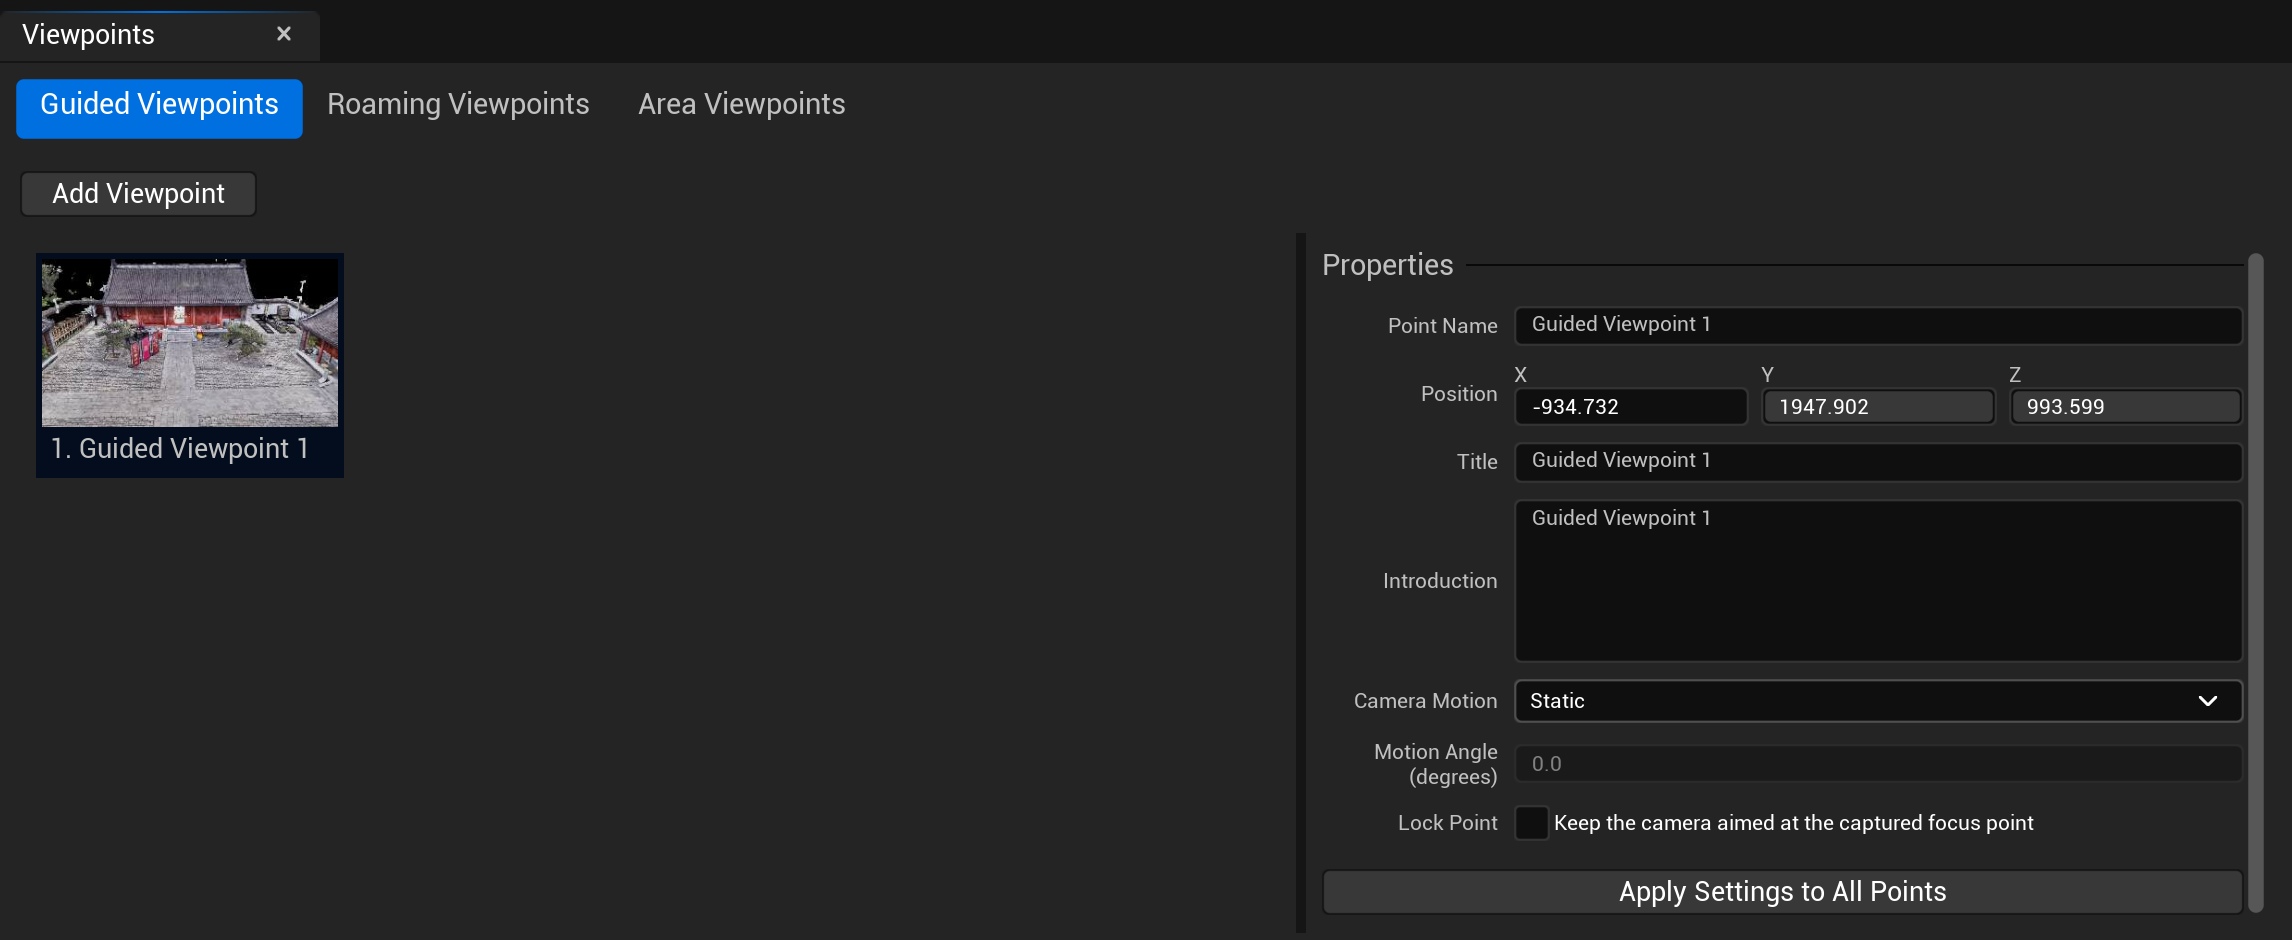 Figure: Guided Viewpoints
Roaming Viewpoints
Figure: Roaming Viewpoints
Create a Route
- Select Roaming Viewpoints, click New Route and enter a route name.
- Position the camera at the start and add a point. Move to the next location and repeat.
- Set each point's hold duration, transition duration to the next point and transition mode.
- Play from the start and check for paths through walls or the ground. Adjust point views and order where necessary.
Up to 10 routes can be created. Organize long presentations by floor, area or subject.
Holds, Transitions and Camera Motion
| Property | Usage |
|---|---|
| Hold Time | Time spent at the current point, in seconds |
| Transition Time | Time to reach the next point, in seconds |
| Transition | Teleport, Linear, Ease In Out, Ease In or Ease Out |
| Camera Motion | Static, Pan, Tilt, Orbit, Left to Right or Right to Left |
| Motion Angle | Motion amplitude during the hold, in degrees |
| Lock Point | Keeps the camera aimed at the captured focus for the appropriate motion. Preview after setting it |
| Apply to All | Applies settings in a batch; locked roaming points are excluded from the corresponding batch change |
Use Previous, Play / Pause and Next. When the window has input focus, use ←, Space and →.
Export a Roaming Video
In the route export settings, choose the output path, width, height and frame rate. Select the format, H.265, subtitles and Point Cloud mode as needed. The default is 1920 × 1080 at 30 FPS. Preview the route before exporting, then inspect the output file.
A route uses individual viewpoints with holds and transitions. For camera changes at precise times, use the Scene Walkthrough timeline.
Area Viewpoints
- Select Area Viewpoints and click Add Viewpoint.
- Select the thumbnail on the left, enter a Point Name and adjust Position as needed.
- Enter Area Length (m) and Area Width (m) in meters.
- Area (m²) is calculated automatically from the entered length and width.
For an irregular region, use Area Measurement.
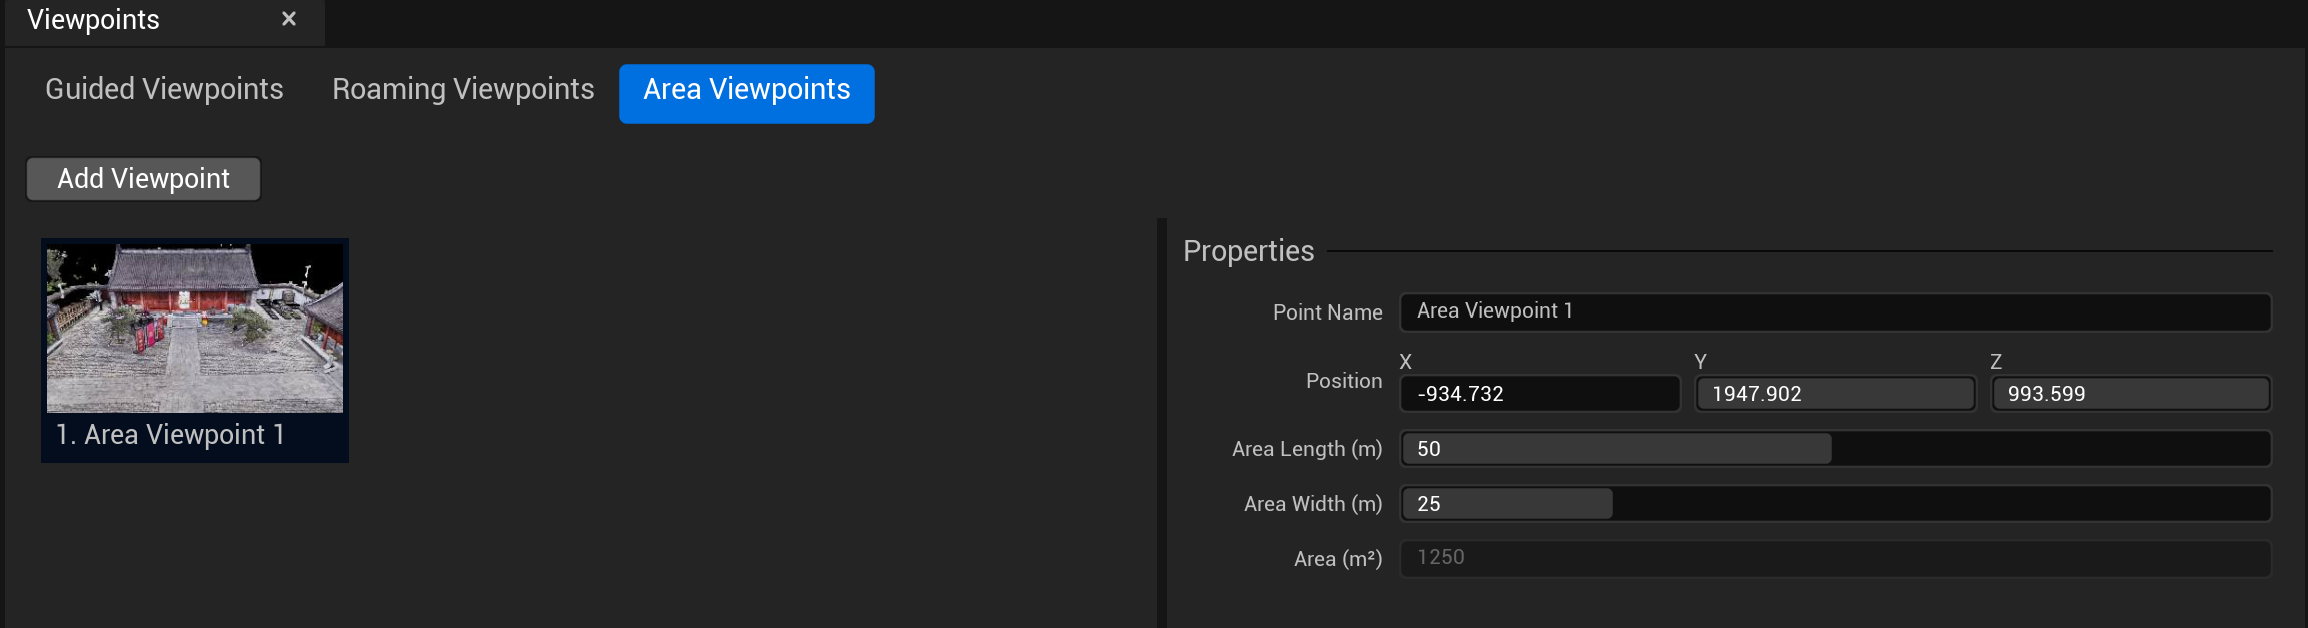 Figure: Area Viewpoints
Scene Flythrough
A walkthrough uses camera keyframes on a timeline to specify where the camera should be at a particular time. It can be previewed or exported as a video. Click Scene Roam on the Scene page to open the timeline.
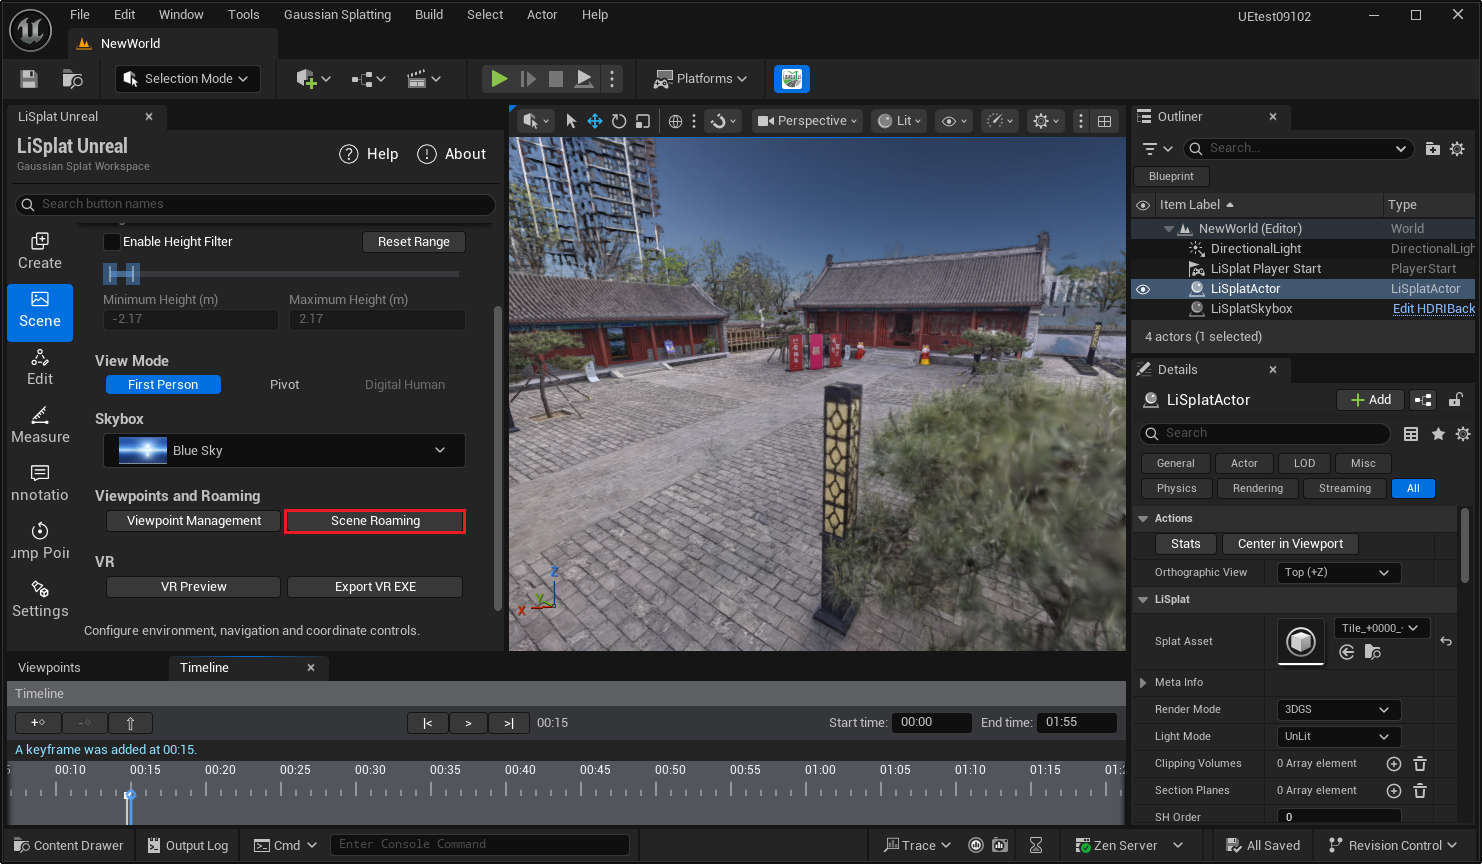 Figure: Scene walkthrough timeline
Set the Time Range
Set Start Time and End Time on the timeline using the minutes-and-seconds format shown in the panel. Include all keyframes intended for playback or export.
Add Keyframes
- Move the playhead to the starting time, then position the camera and adjust its direction in the viewport.
- Click Add Keyframe to record the current view.
- Move the playhead to a later time, position the camera at the next location and add another keyframe.
- Repeat to build the route.
Camera position and direction are captured from the viewport.
Adjust and Play
Drag the playhead to view different times. Use the playback, pause and navigation buttons to preview the route. To change a camera position or direction, adjust it in the viewport and update the keyframe. Adjust the time between keyframes to change the pace. Select and delete unwanted keyframes.
Export Video or an Image Sequence
- Open Export settings and choose an output path.
- Set Width / Height, default 1920 × 1080, and Frame Rate, default 30 FPS.
- Choose MP4, AVI or PNG Sequence. Video export can use H.265 and optionally delete intermediate frames.
- Export, then check that the output is complete and matches the camera path.
Higher resolutions and longer videos take more time and disk space. PNG Sequence outputs a folder of images that can be assembled in editing software.
This workflow differs from 360-Degree Panoramic Video. Follow that chapter for panoramic output.
Loading Animation
Loading animation reveals the scene from empty to point cloud, then to Gaussian splatting. Preview it in the editor or Play mode. In LiSplatActor → Details → Animation, select Enable Animation.
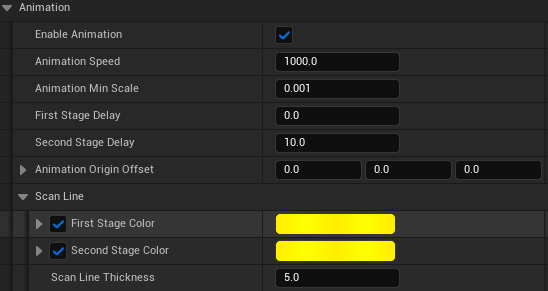 Figure: Loading animation settings
Animation Stages
In 3DGS mode, the first stage reveals a point cloud and the second changes it into Gaussian splatting. In Point Cloud mode, both stages use points, with a denser second stage.
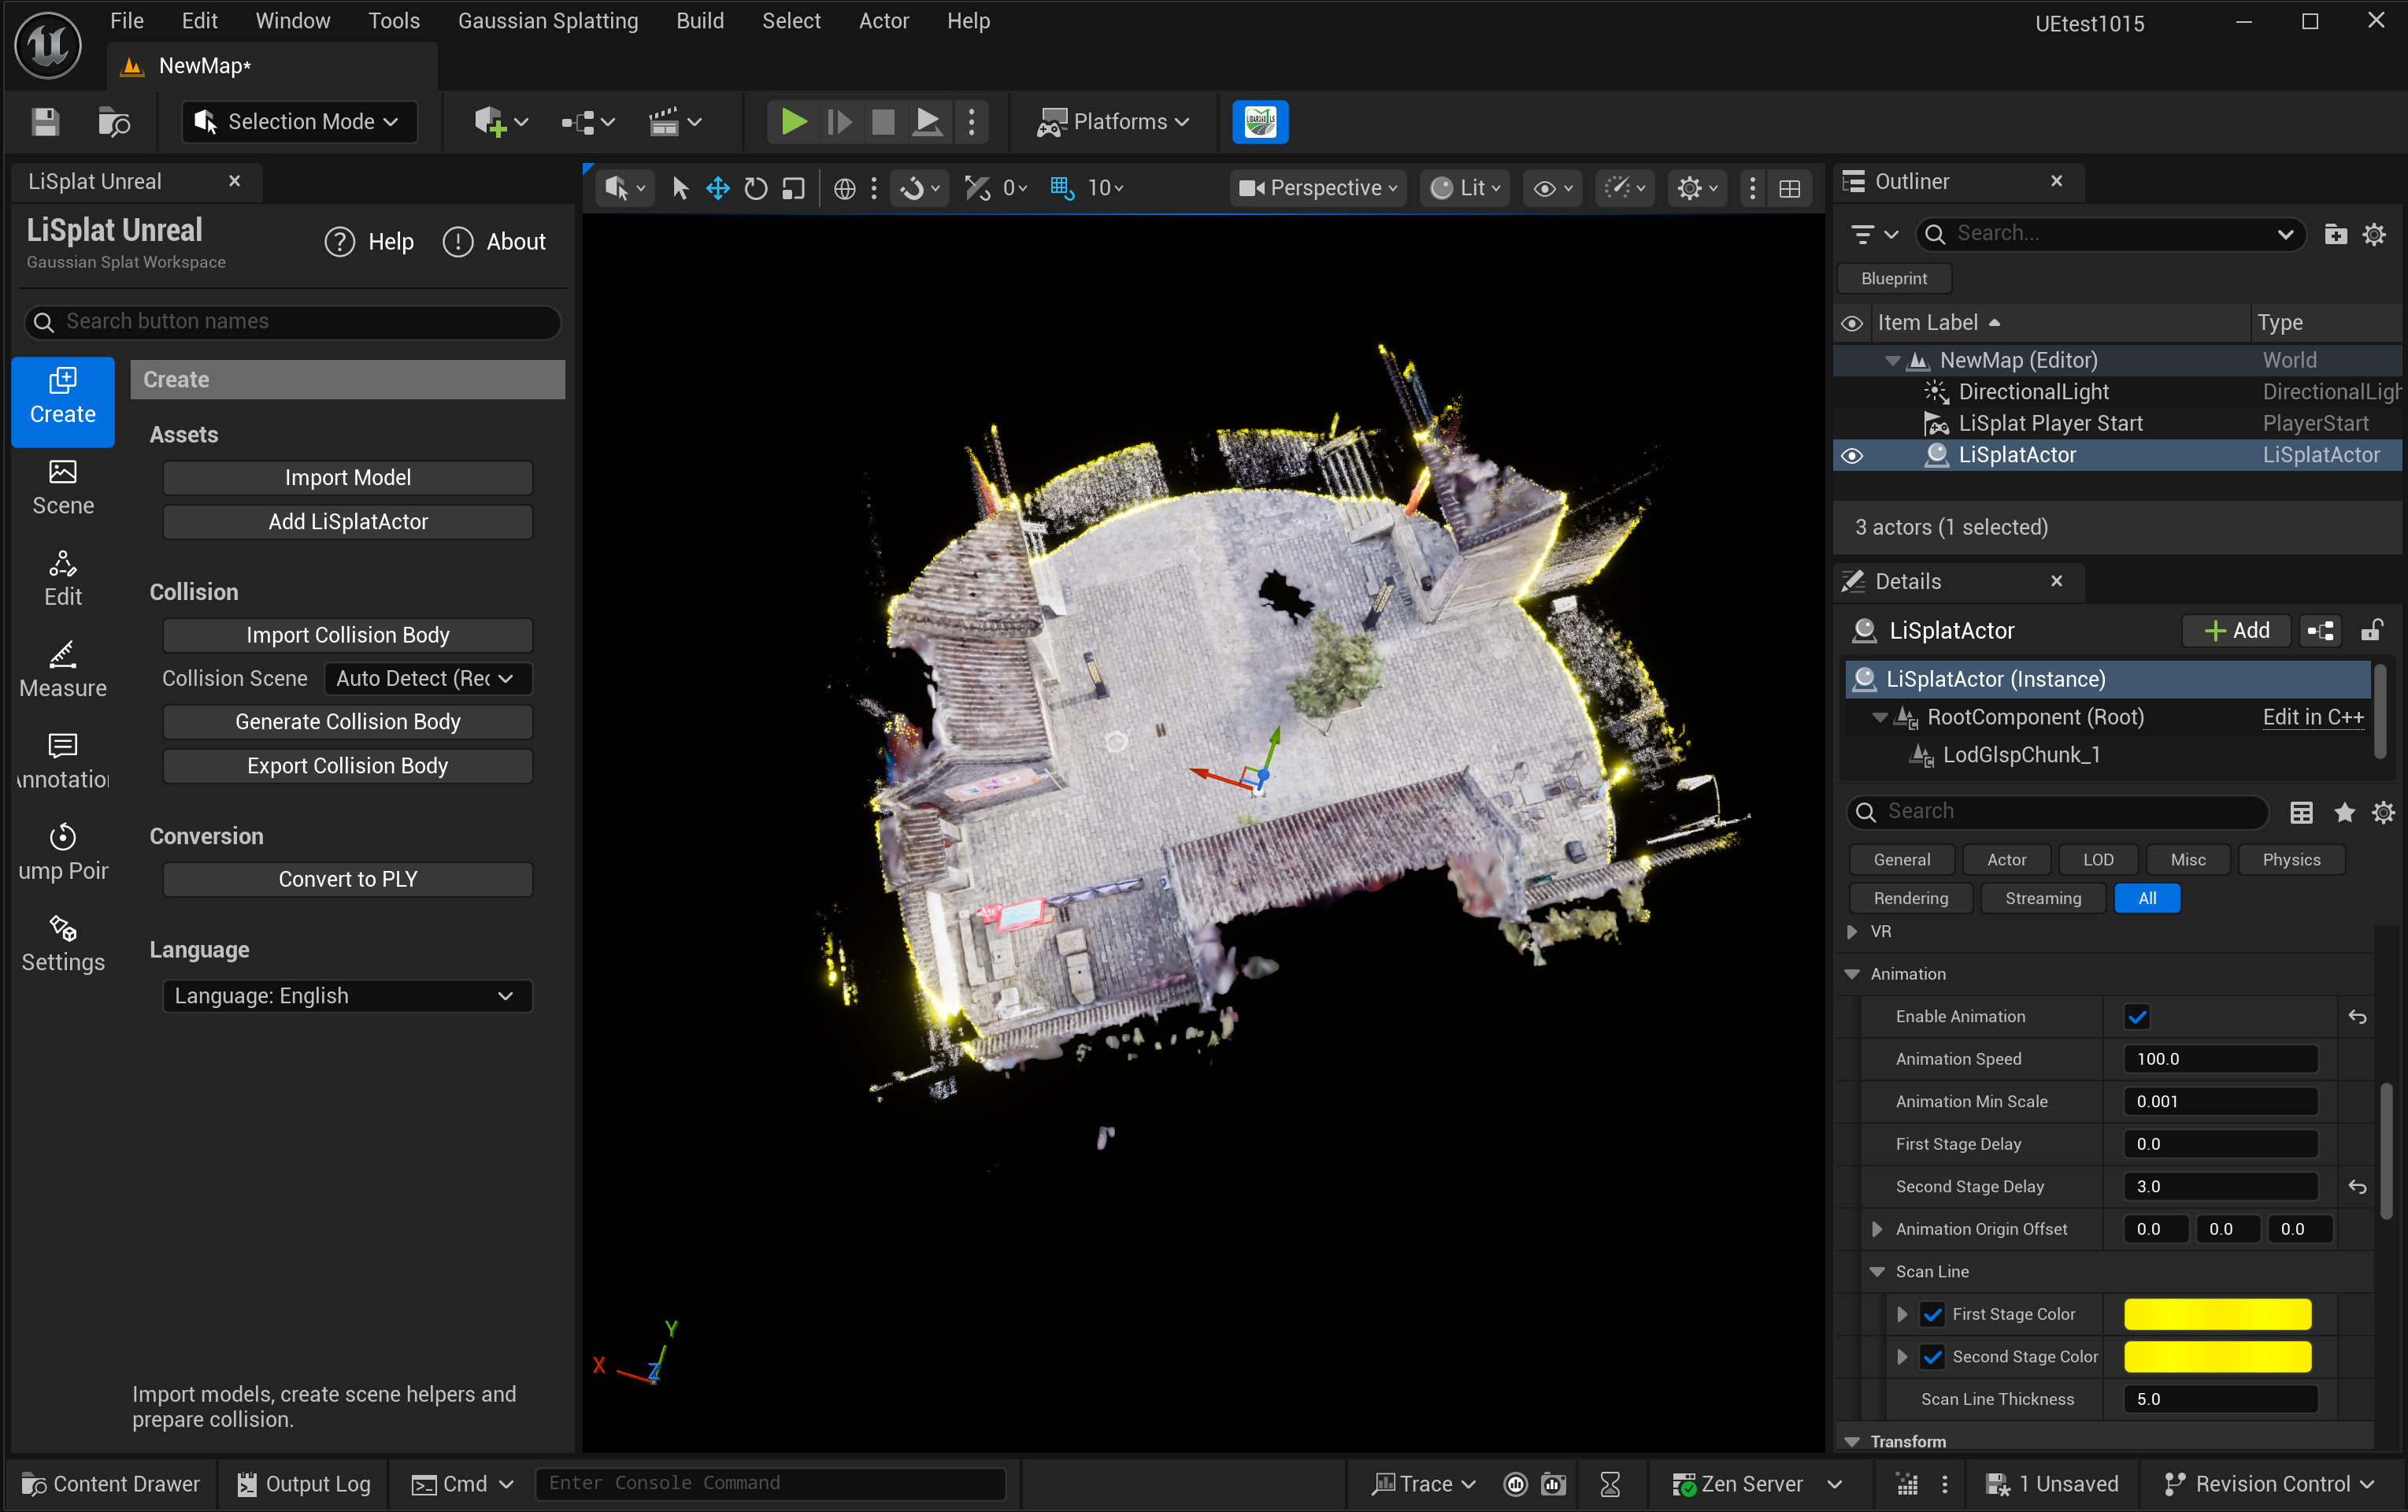 Figure: Loading Animation
Animation Parameters
| Parameter | Usage |
|---|---|
| Enable Animation | Enables or disables loading animation |
| Animation Speed | Adjusts playback speed for the scene |
| Animation Min Scale | Adjusts point size at the start of the animation |
| First Stage Delay | Sets when the first stage starts |
| Second Stage Delay | Sets when the second stage starts |
| Animation Origin Offset | Adjusts the animation's starting position |
Scan Line
Under Scan Line, set First Stage Color and Second Stage Color, both gold by default. The associated checkboxes control visibility of each scan line, while color Alpha controls opacity.
Scan Line Thickness defaults to 5. Increase it to emphasize the scan boundary, or reduce it if it obscures detail.
Steps
- Enable animation and preview the default settings.
- Adjust speed and origin offset to start from the intended location.
- Adjust the stage delays to control the point-cloud portion.
- Tune scan-line colors, opacity and thickness for the background, then save the level.