
Editing
Use the Edit page to select, delete, clone, separate, recolor or crop data. Select the intended LiSplatActor before choosing a tool. Selected content is highlighted. Keep source files for important datasets.
Selection Tools
Rectangle and Polygon
| Tool | Usage |
|---|---|
| Rectangle | Click two opposite corners to select the region. Backspace removes the last construction point |
| Polygon | Click to draw straight edges, or hold the left button and drag for a continuous outline. Double-click to finish; right-click to undo the last segment |
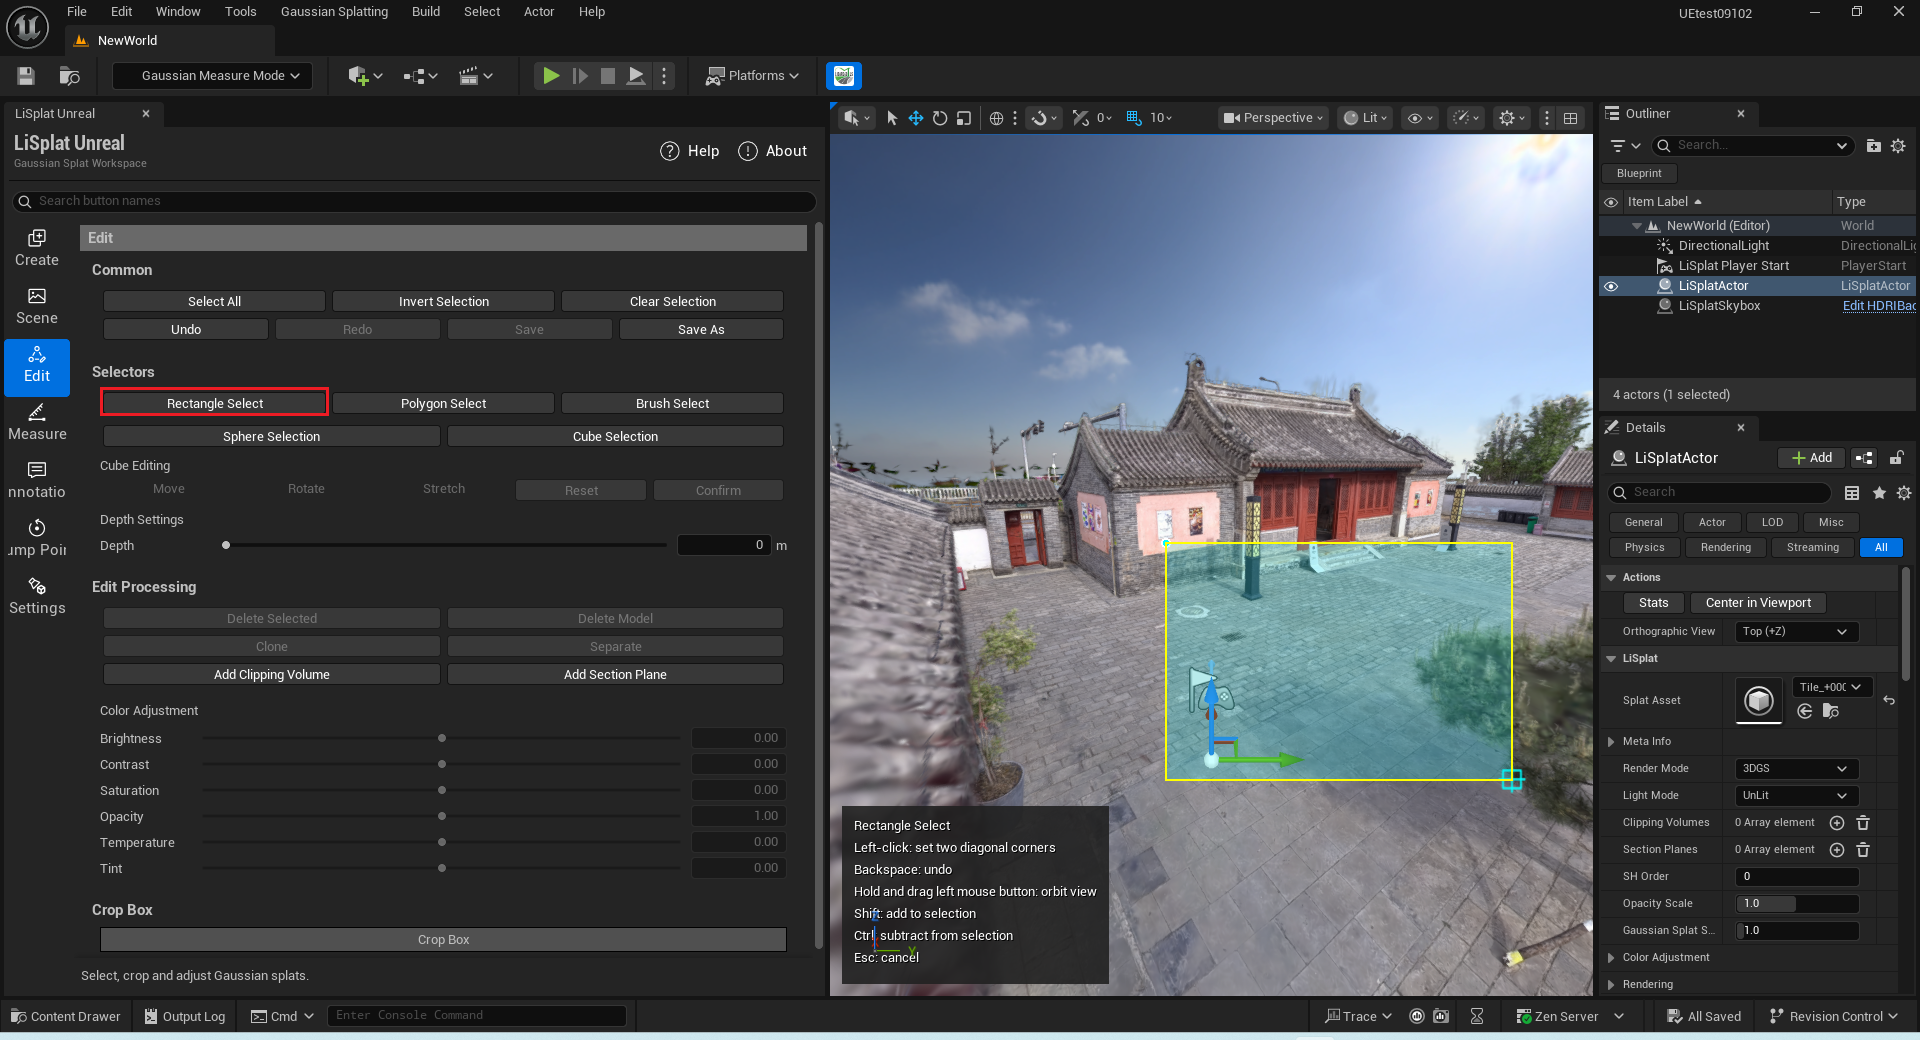 Figure: Rectangle selection
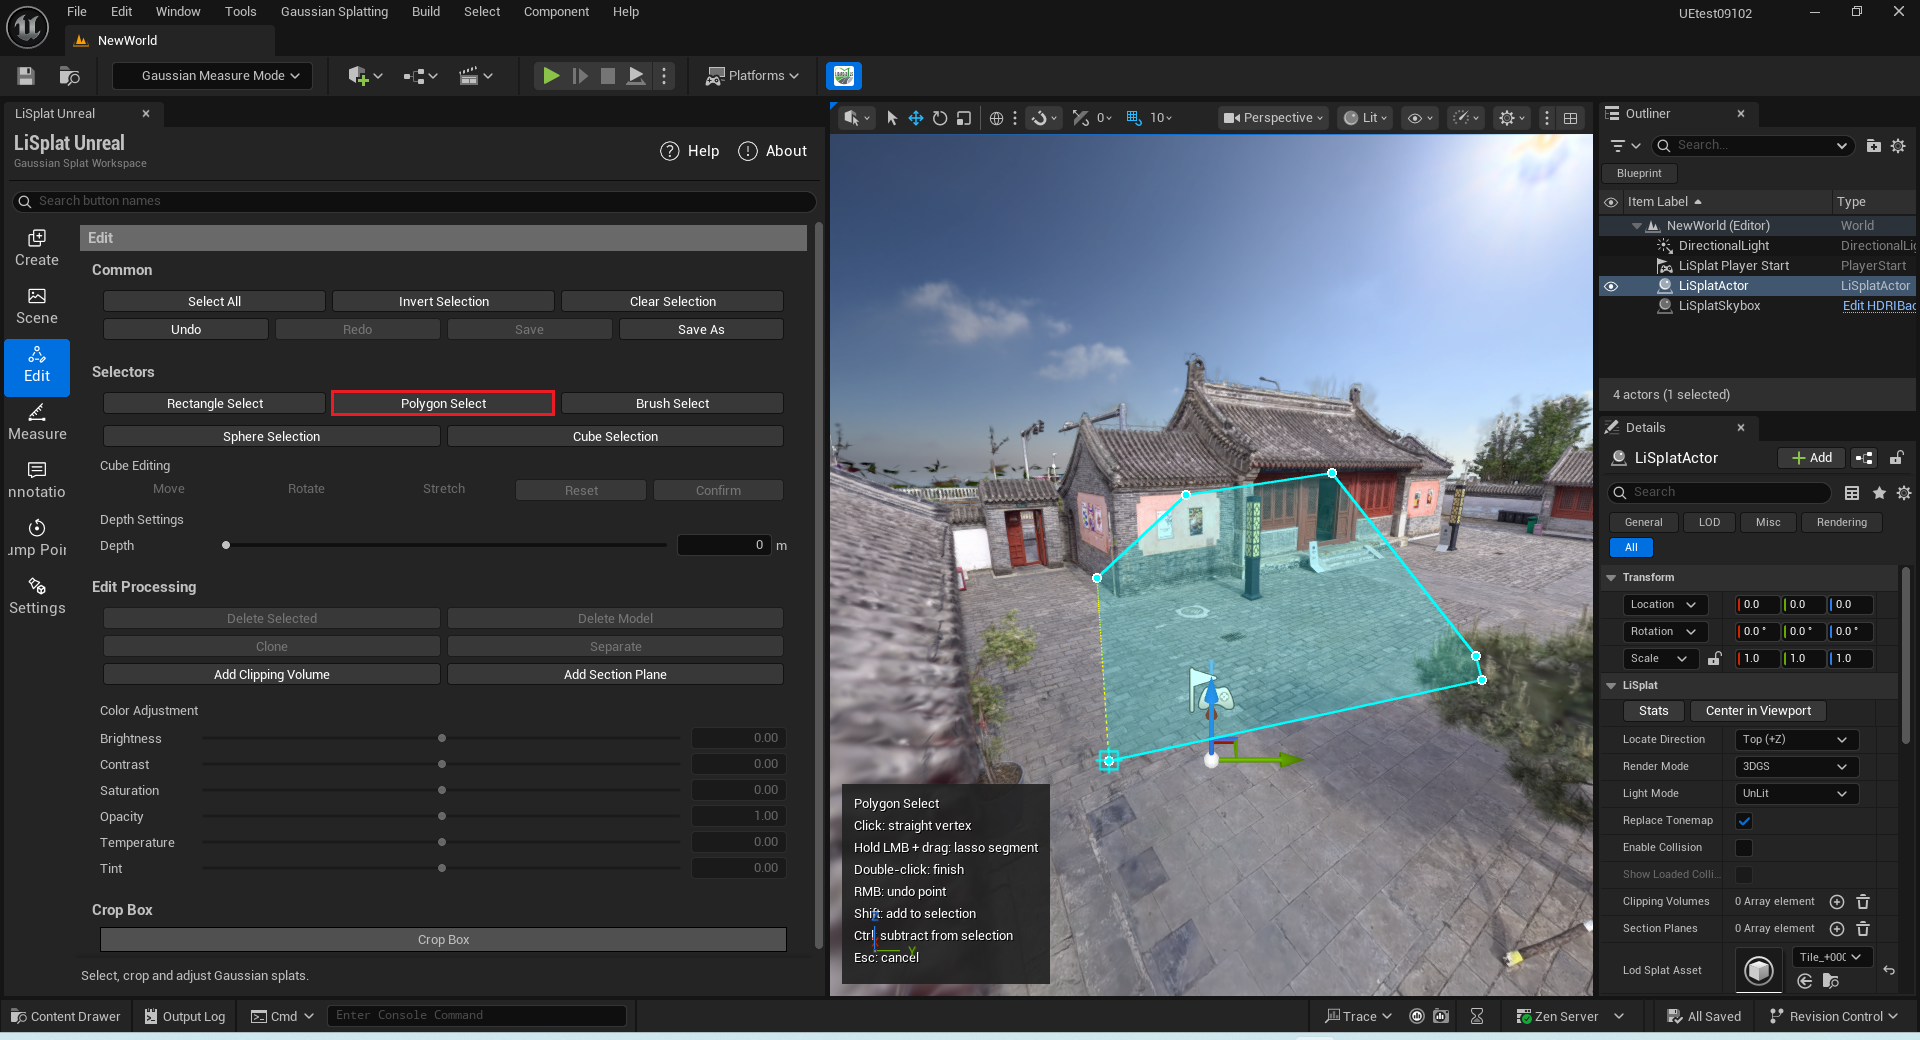 Figure: Polygon selection
Brush and Sphere
| Tool | Usage |
|---|---|
| Brush | Hold the left button and paint. Shift adds to the selection; Ctrl subtracts. Keep the same operation during one stroke |
| Sphere | Move the pointer to position the sphere. Click or hold the left button and drag to select continuously. Ctrl + wheel changes the radius |
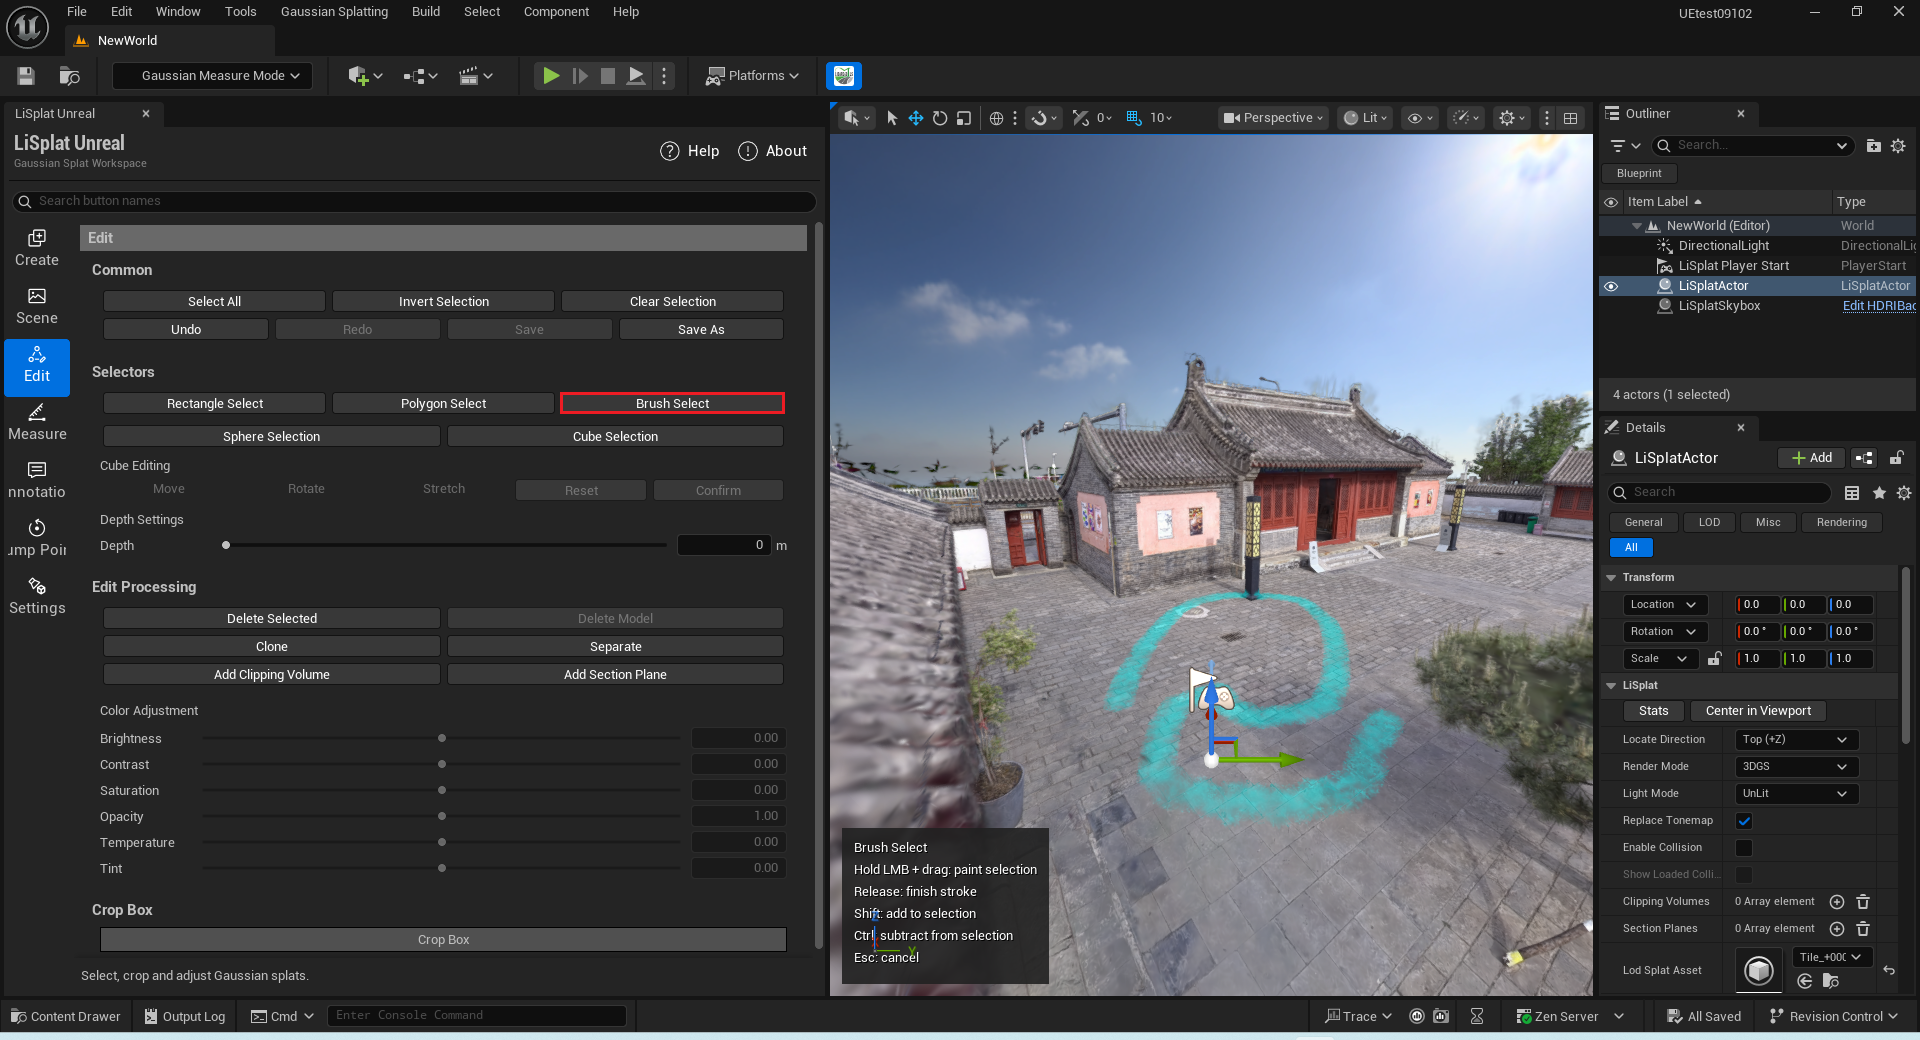 Figure: Brush selection
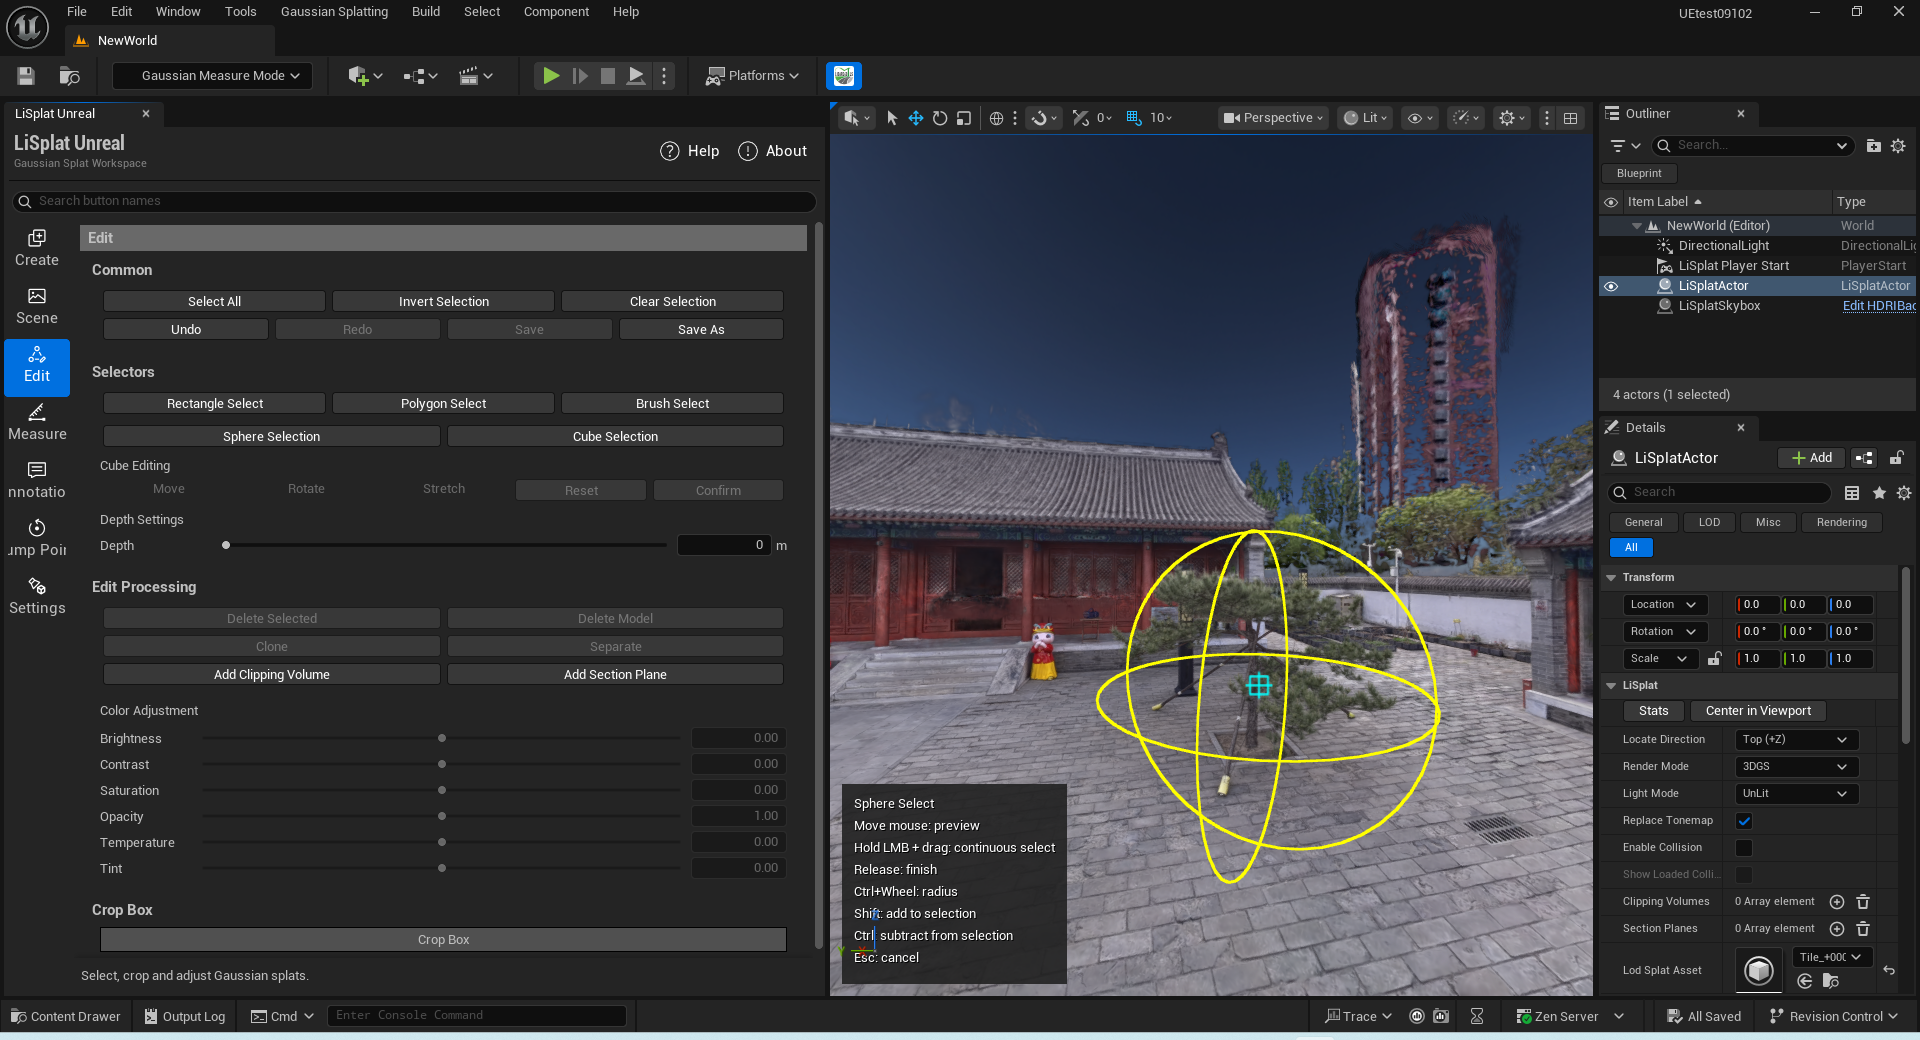 Figure: Sphere selection and radius
Cube
- Click two opposite corners of the base, then a third point to define height.
- Translate, rotate and scale the selection volume to fit.
- Click Confirm, press Enter or right-click to confirm. Click Reset to start again.
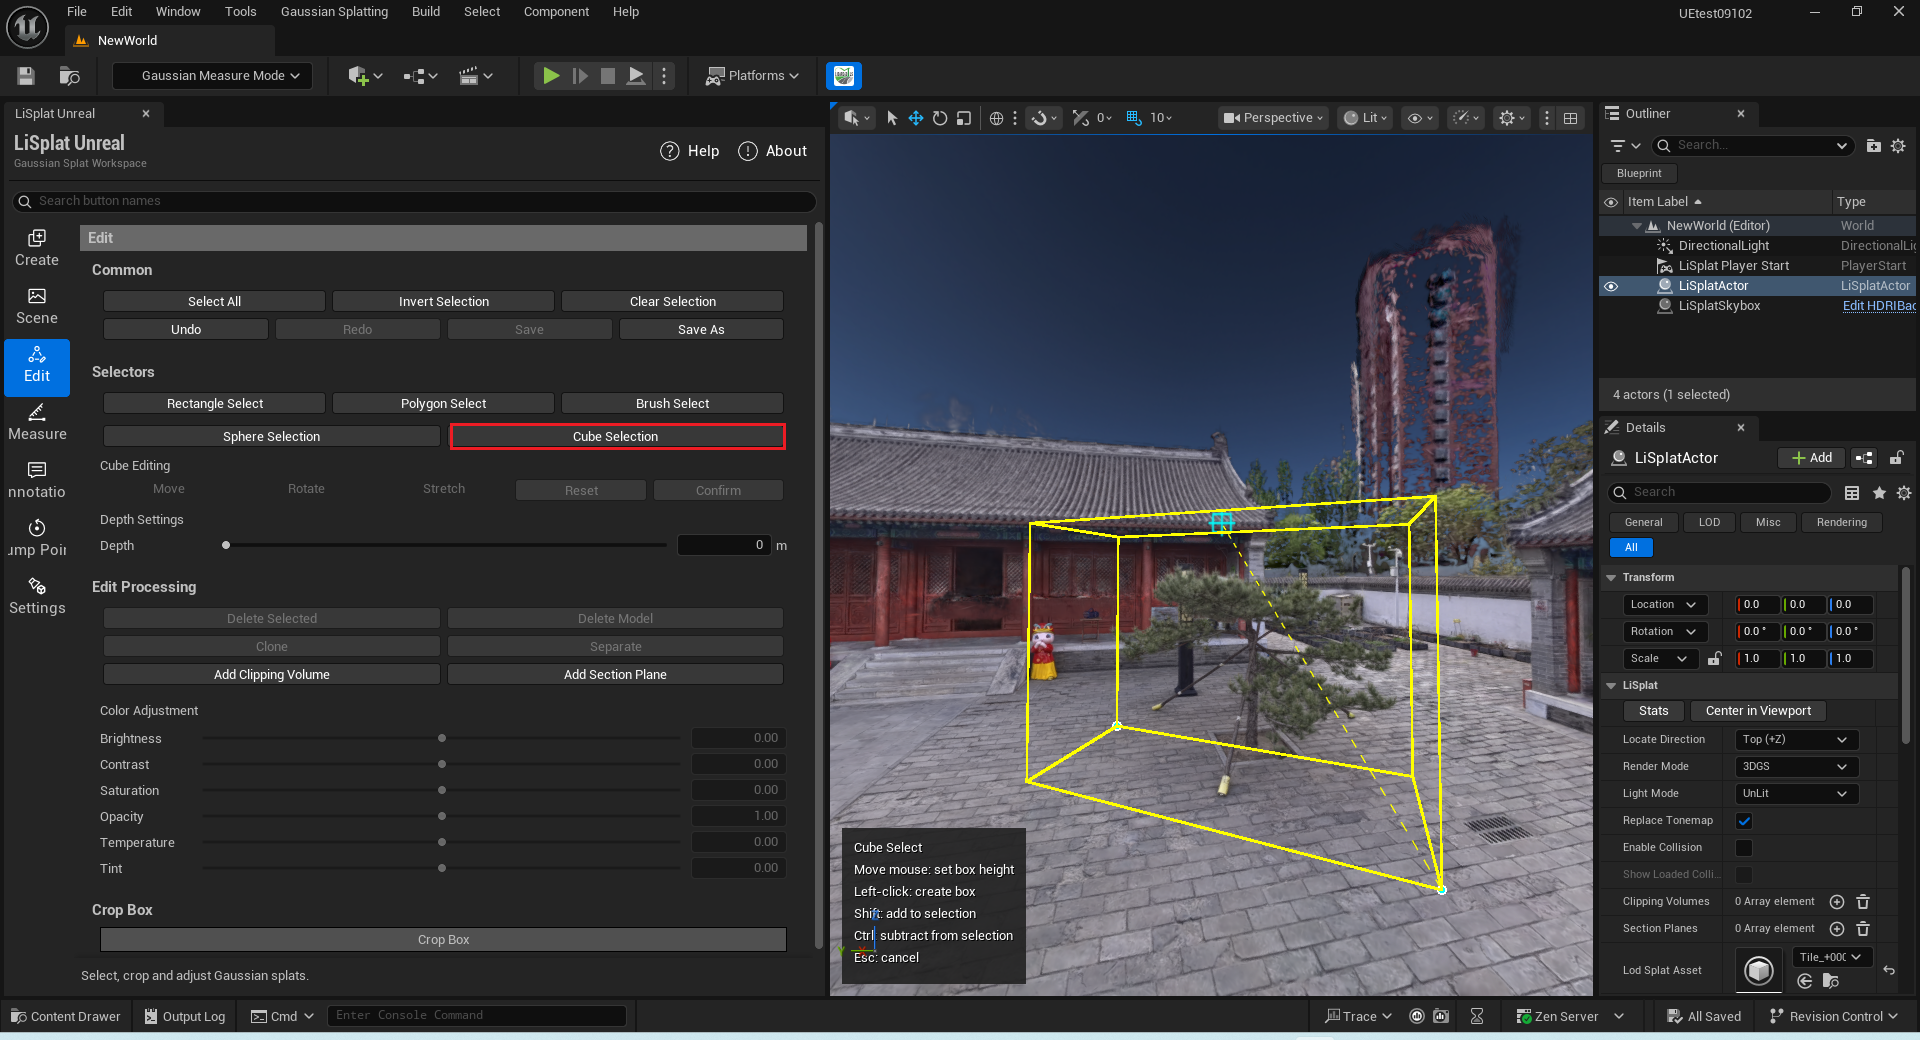 Figure: Draw a cube selection
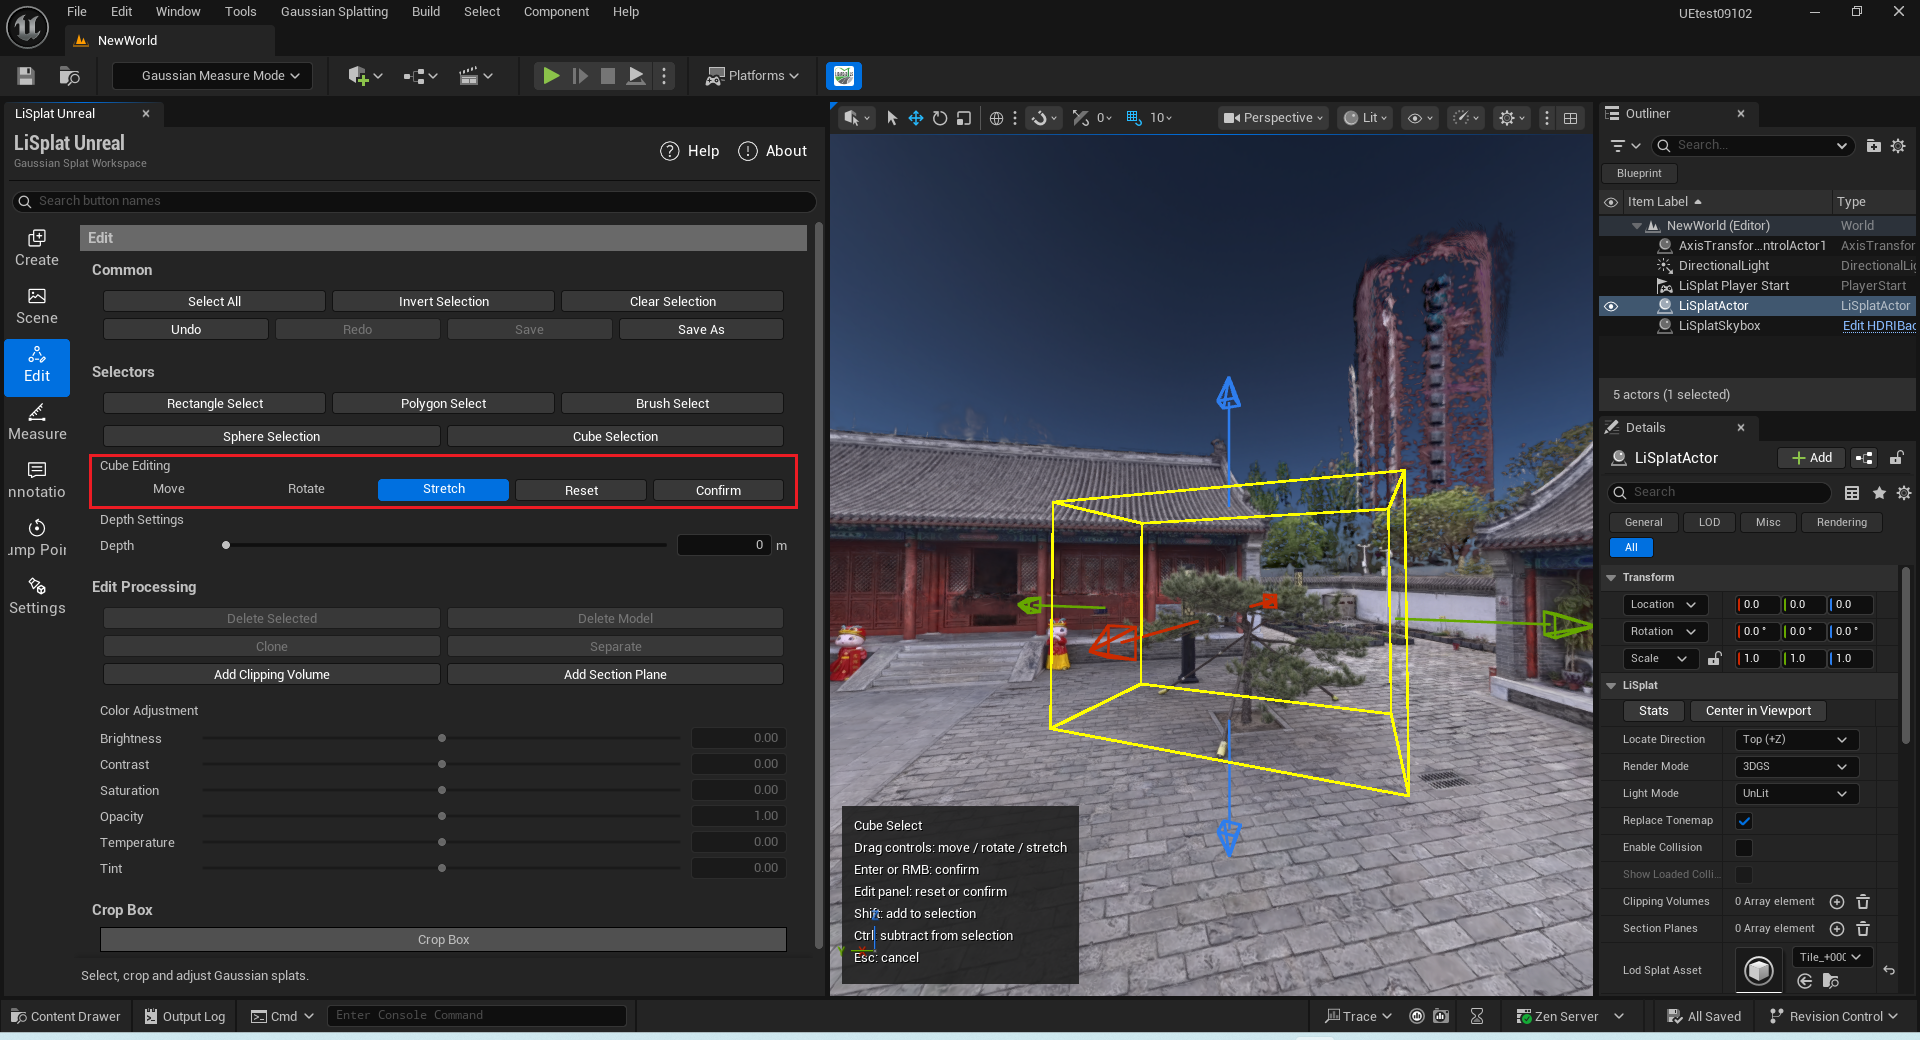 Figure: Adjust and confirm the cube selection
Selection Management
Use Select All, Invert Selection and Clear Selection to manage the current selection. Inspect it from multiple directions before editing to avoid selecting unintended data behind the target.
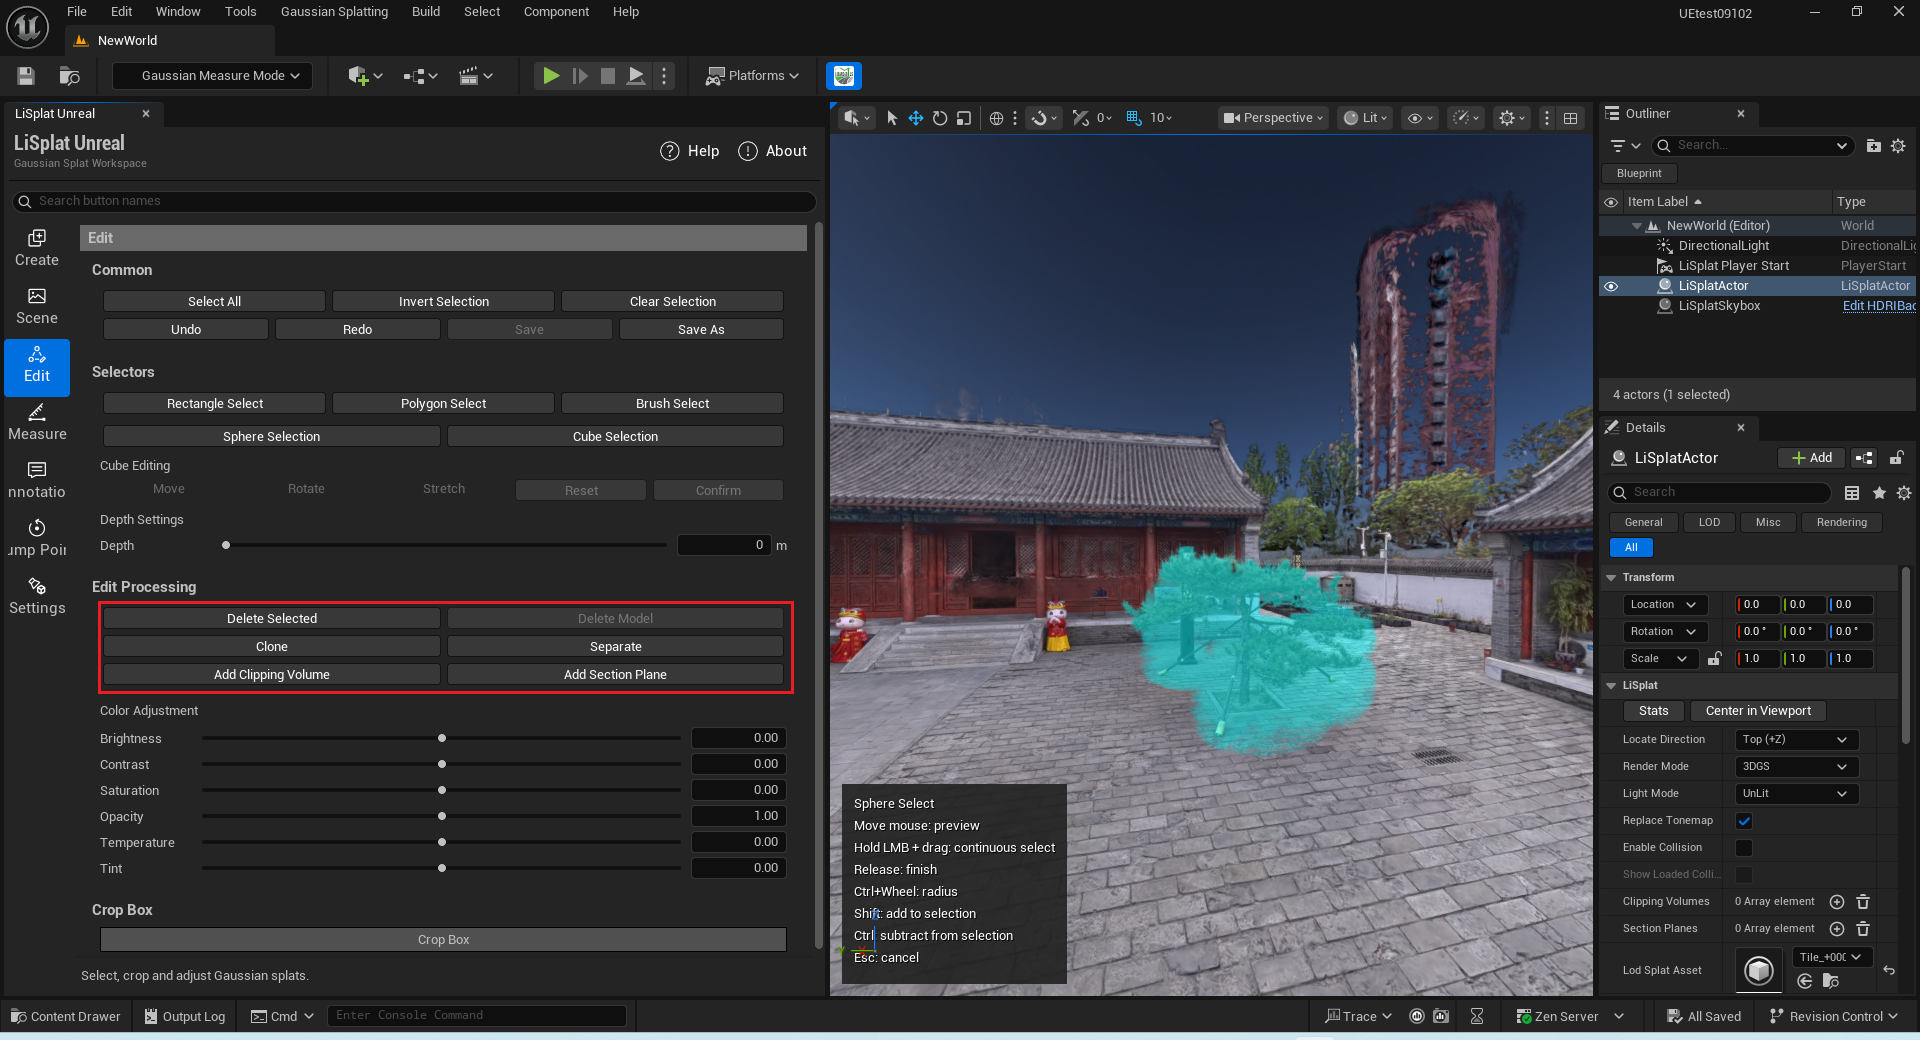 Figure: Editing tools
Delete and Restore
Select content and use Delete. Use Undo to reverse an operation, or Redo to restore an undone operation. Check the active dataset and target before undoing.
Clone
- Select the portion to copy.
- Click Clone to create a copy while keeping the original content.
- Select the generated object and move, rotate or scale it to fit the scene.
- Check that the copy is complete, then save the edit and level.
Separate
- Select the portion to handle independently and click Separate.
- The selected content becomes a separate object and is removed from the original object.
- Select the original and the separated object in the Outliner to inspect their boundaries, then adjust them independently.
Clone duplicates existing content. Separate splits part of a scene for independent handling. Check the selection first, especially around doors, windows and thin features.
Color Adjustment
Select the content, open Color Adjustment and observe changes as you edit. Start with small changes for large selections.
| Parameter | Initial value | Usage |
|---|---|---|
| Brightness | 0 | Adjusts brightness of the selected data |
| Contrast | 0 | Adjusts light–dark differences; excessive contrast can lose shadow or highlight detail |
| Saturation | 0 | Adjusts color intensity |
| Opacity | 1 | Controls transparency of the selection |
| Temperature | 0 | Adjusts cool and warm color balance |
| Tint | 0 | Further adjusts color bias |
These initial values preserve the original appearance. Confirm the selection before applying a local adjustment. Undo and retry if necessary.
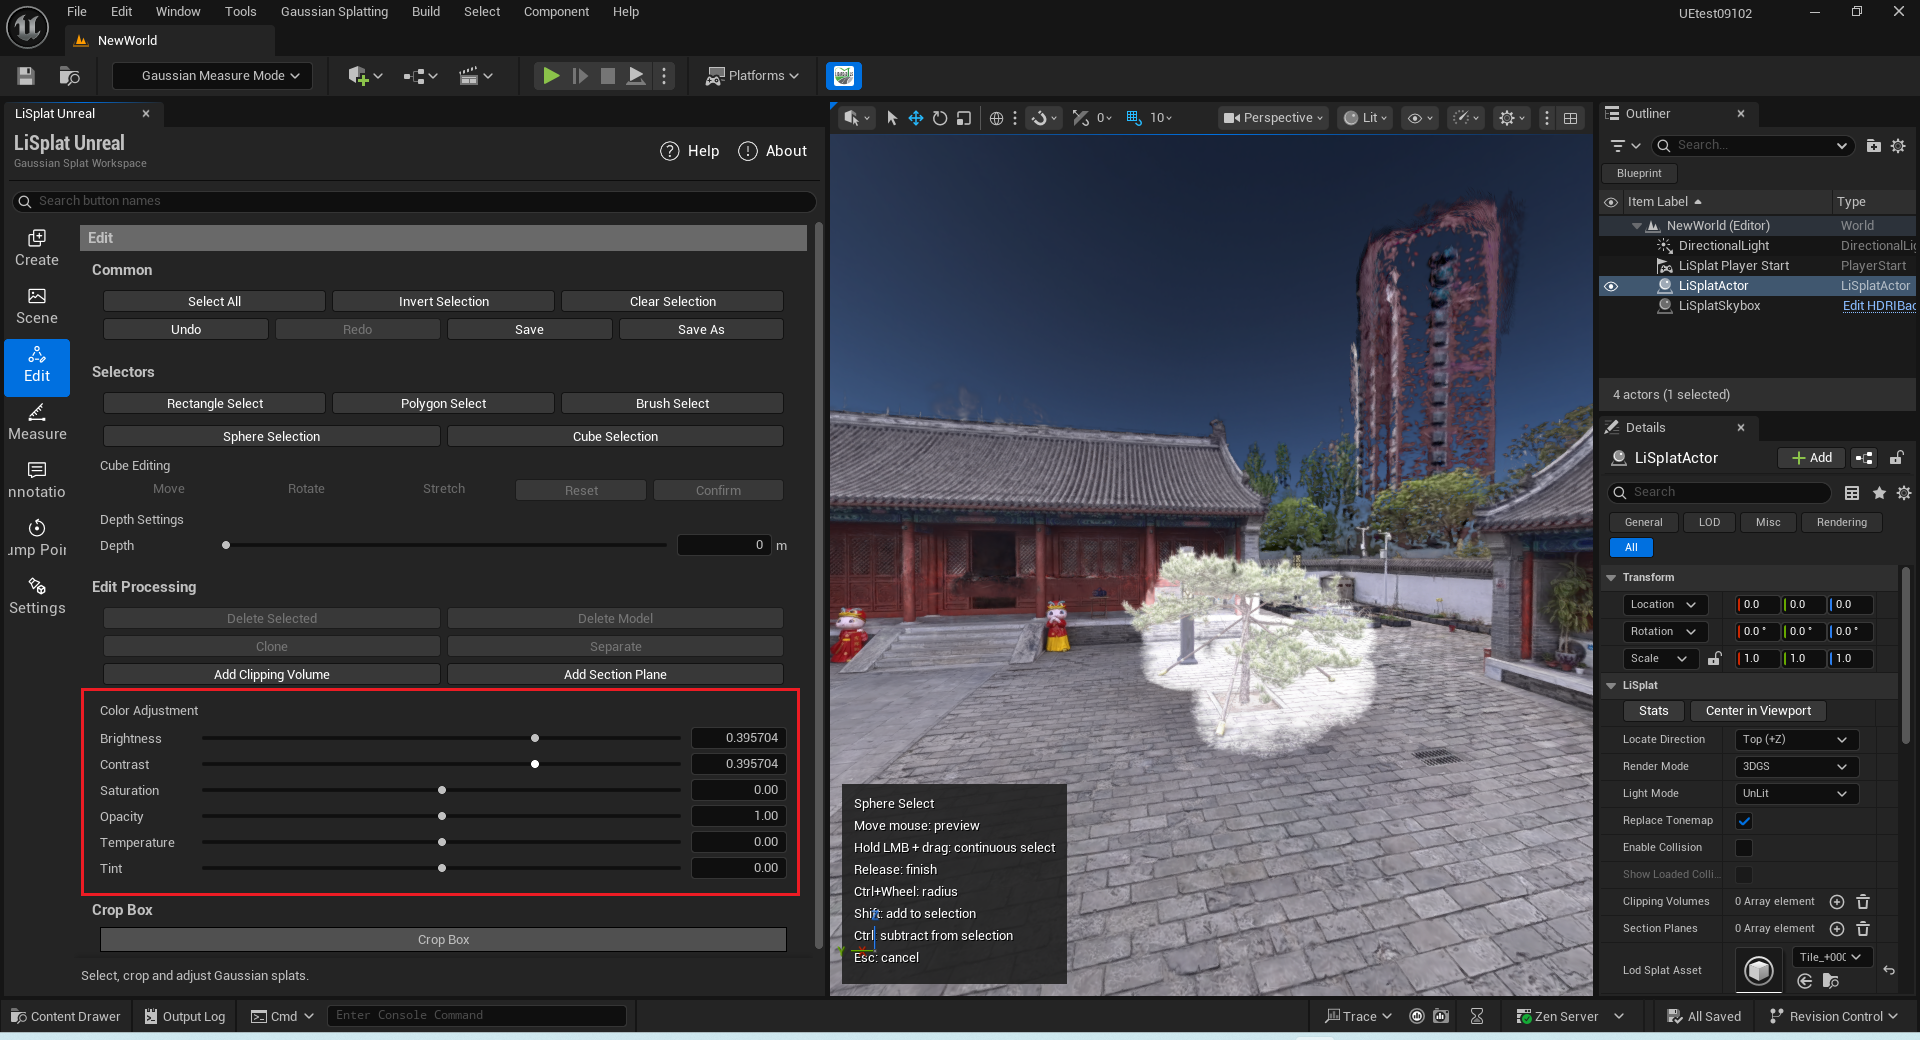 Figure: Color adjustment for selected data
Clipping
Crop Box
The crop box crops using an adjustable bounding box. Open the crop tool on the Edit page, translate, rotate and scale the box, then choose the retained side and boundary rule.
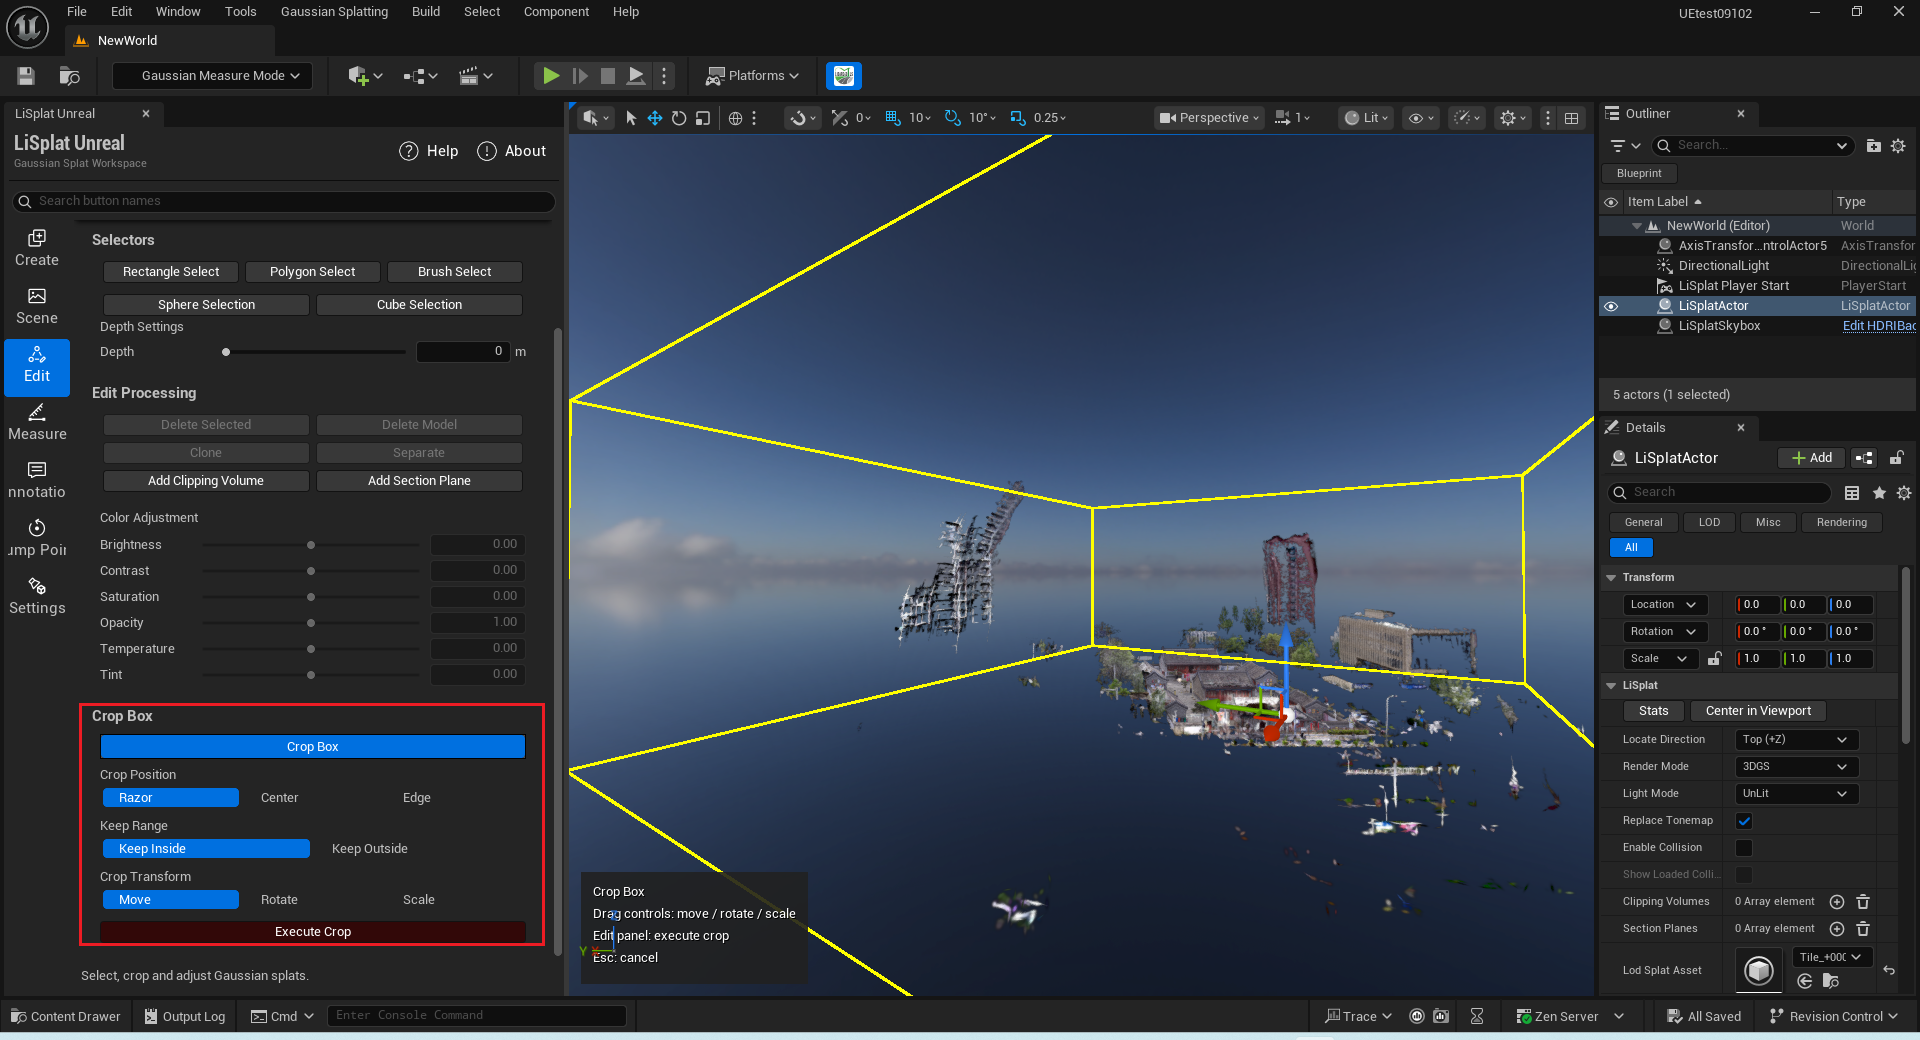 Figure: Crop box and cropping settings
Parameters
| Parameter | Options and meaning |
|---|---|
| Crop Position | Razor gives a stricter boundary; Center suits general cropping; Edge retains more boundary detail |
| Keep Range | Inside keeps content inside the box; Outside keeps content outside |
| Transform | Adjusts box position, rotation and size |
| Execute Crop | Applies the current box and options |
Steps
- Select the LiSplatActor to crop and open the crop box tool.
- Position and resize the box. Inspect upper, lower, front and rear boundaries from different angles.
- Select Inside or Outside to specify which side to keep.
- Start with Center for ordinary cropping. Compare Razor and Edge when a stricter or more inclusive boundary is needed.
- Click Execute Crop. Undo, adjust and retry if the result is unsuitable.
Clipping Volumes
Clipping volumes control the displayed region using a box or sphere. Their position and size can be changed at any time.
Add and Assign
- Select the LiSplatActor to clip. On the Edit page, click Add Clipping Volume.
- The new LiSplatClippingVolume is assigned to the current LiSplatActor automatically, and the clipping effect appears.
- Use the move, rotate and scale tools to position and size the clipping volume.
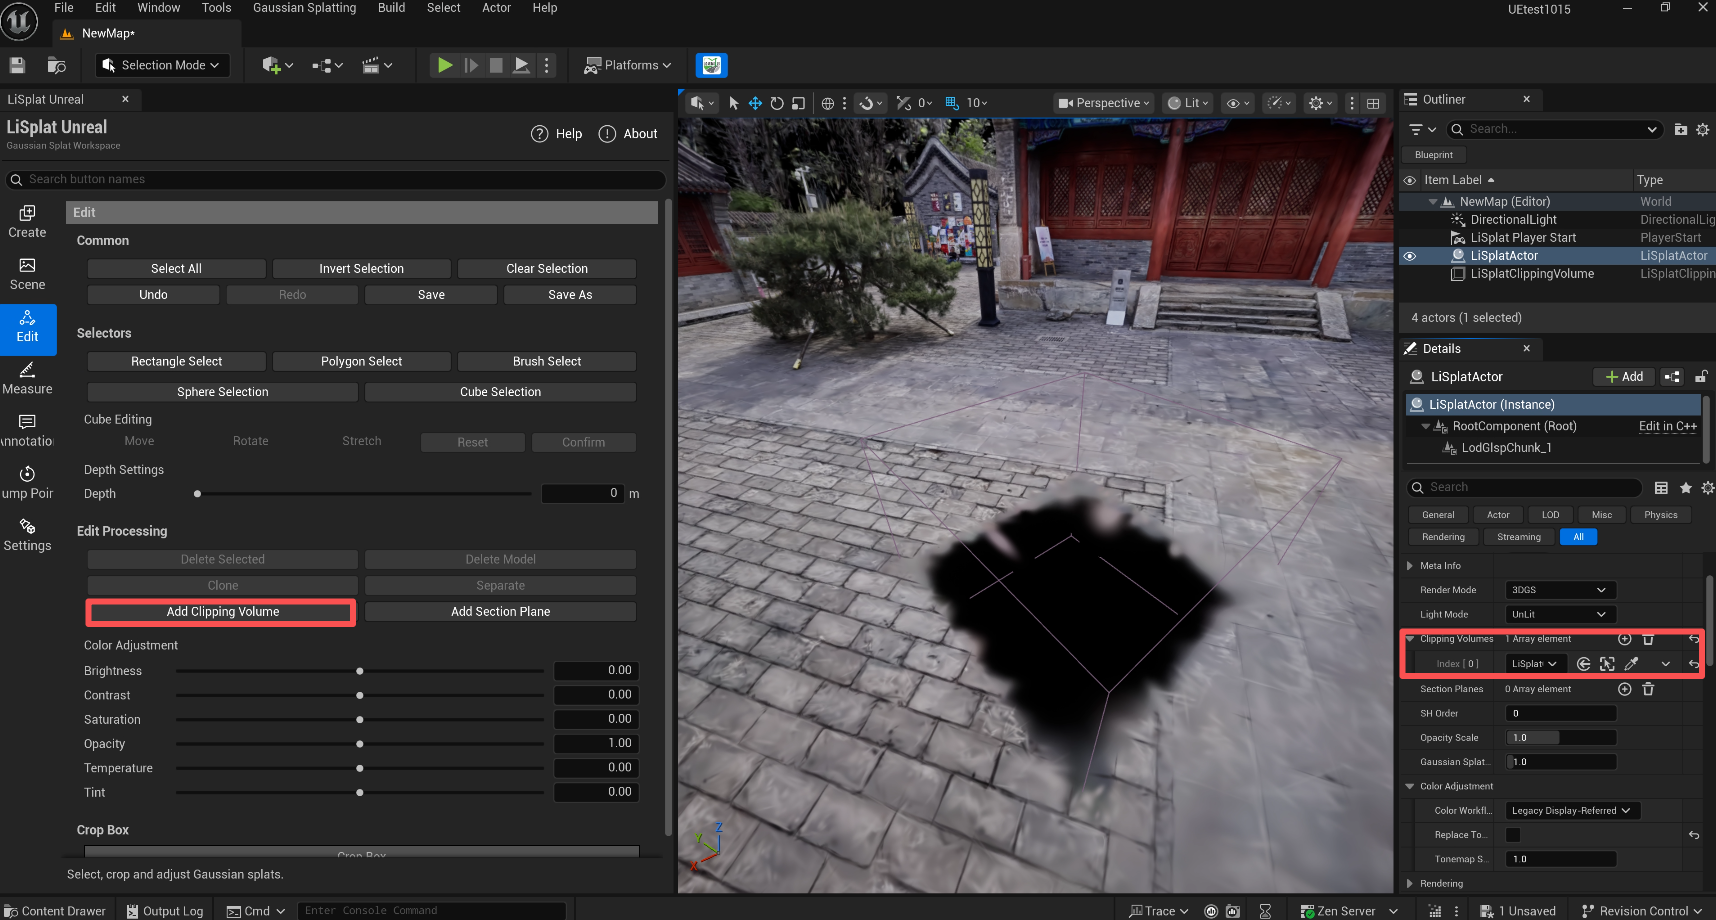 Figure: Add and adjust a clipping volume
Clipping Volume Parameters
| Parameter | Usage |
|---|---|
| Enabled | Applies clipping when selected; clear to disable it temporarily |
| Mode | Inside hides content inside the volume; Outside hides content outside it |
| Volume Type | Select Box or Sphere |
To unlink a volume, remove it from the LiSplatActor's Clipping Volumes array. Delete unused volumes from the Outliner.
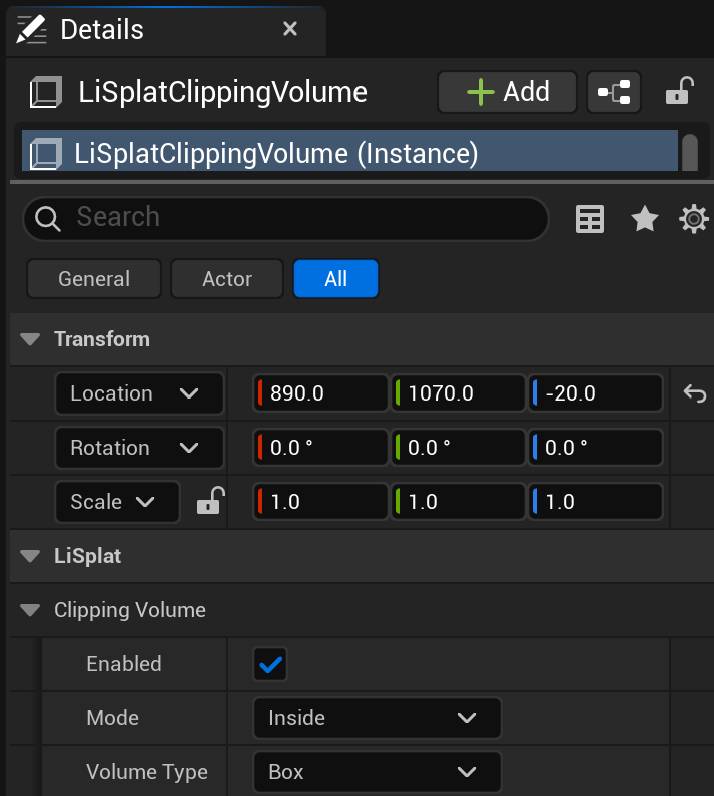 Figure: Clipping volume parameters
Section Planes
- Select the LiSplatActor to section. On the Edit page, click Add Section Plane.
- The new LiSplatSectionPlane is assigned to the current LiSplatActor automatically, and the section effect appears.
- Move and rotate the plane through the target location.
- In the plane's Details, select Enabled and switch Mode between Upside and Downside to choose the required section direction.
Clear Enabled to disable the effect temporarily. Remove the entry from the LiSplatActor's Section Planes array to unlink the plane.
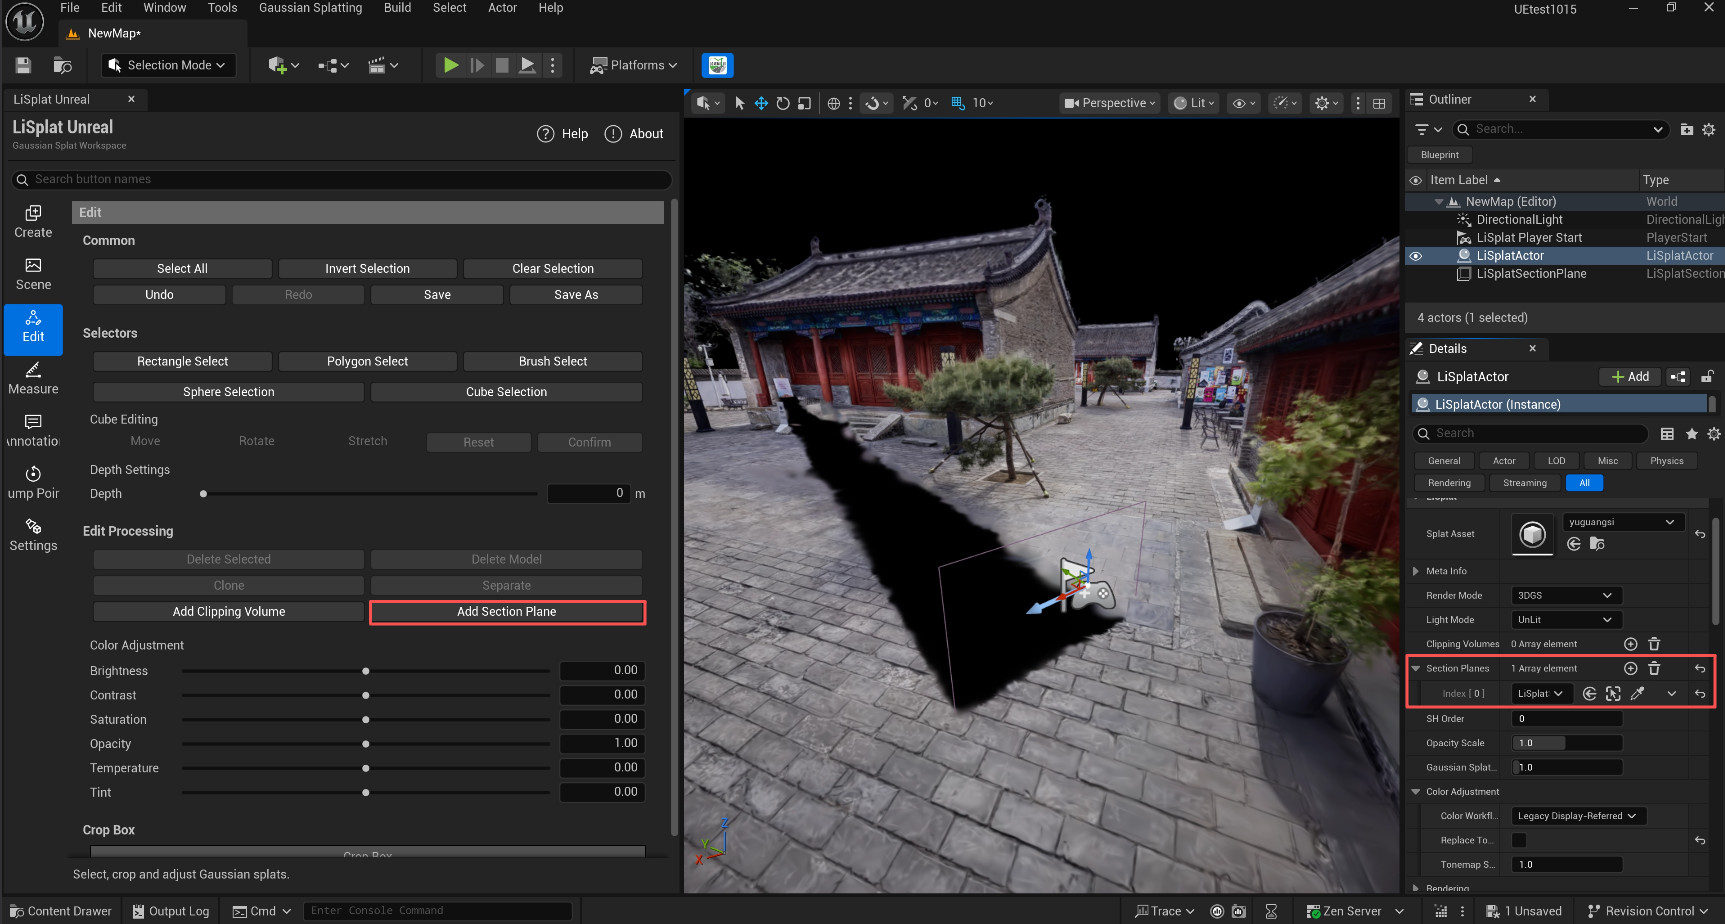 Figure: Add and adjust a section plane
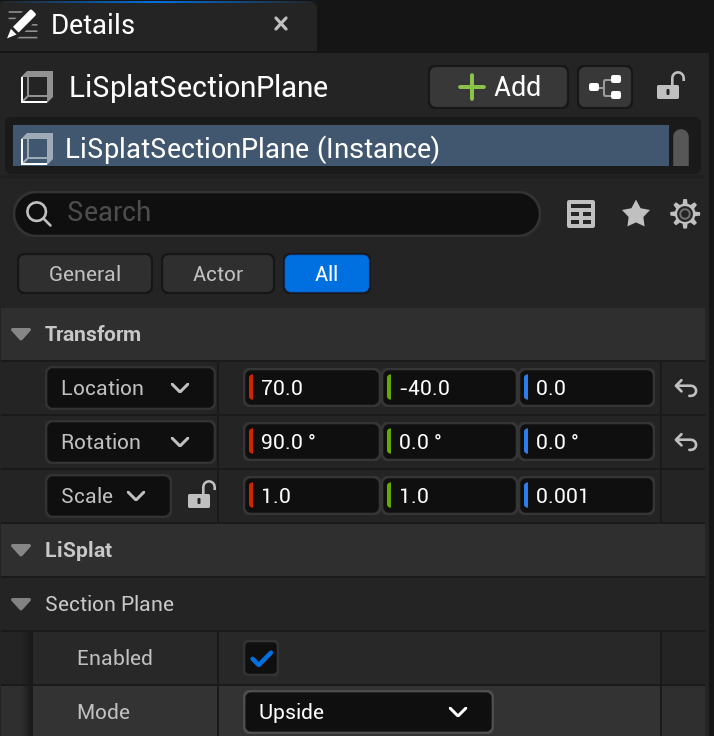 Figure: Section plane parameters
Save and Save As
Save and Save As are both on the Edit page.
| Action | Result |
|---|---|
| Save | Persists soft-deletion and color-adjustment edits in the current Gaussian asset |
| Save As | Exports the selected LiSplatActor as Gaussian PLY data, including crop, deletion, color-adjustment, clipping-volume and section-plane edits |
Soft deletion hides the selected content without physically removing the original points. Use Save As to create a separate file containing the edited result.