
360-Degree Panoramic Video
Use Level Sequence and Movie Render Queue to render a LiSplat scene to a 360-degree panoramic image sequence.
Enable Render Plugins
Open Edit → Plugins and search for Movie. Enable Movie Render Queue and Movie Render Queue Additional Render Passes, then restart when prompted.
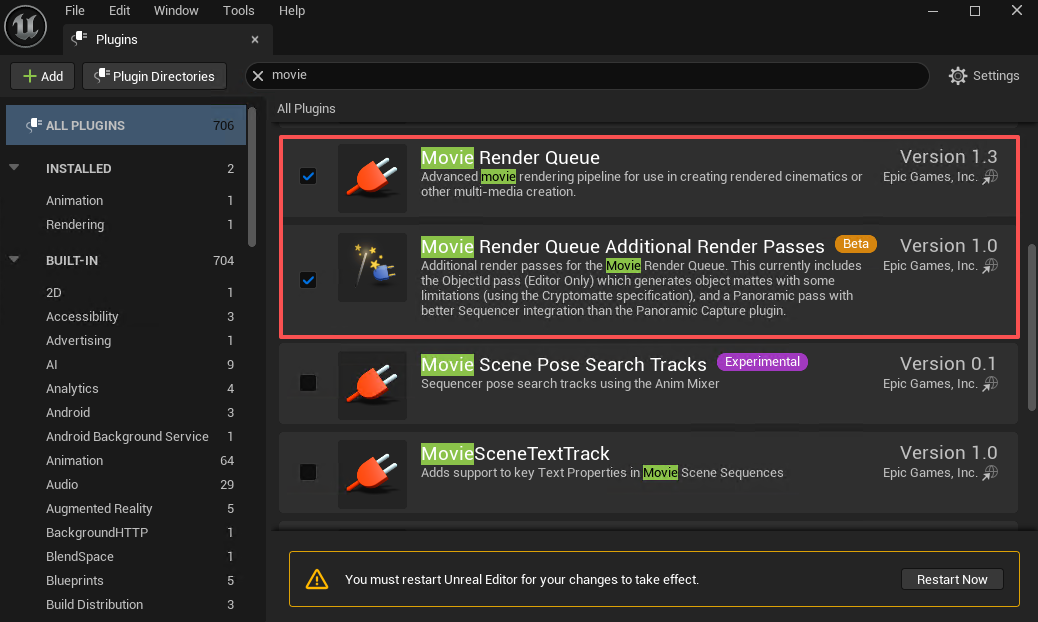 Figure: Enable the plugins for panoramic rendering
Create a Level Sequence
- Right-click an empty area in the Content Browser and select Cinematics → Level Sequence.
- Drag the new sequence into the scene. Right-click it in the Outliner and choose to edit it in Sequencer.
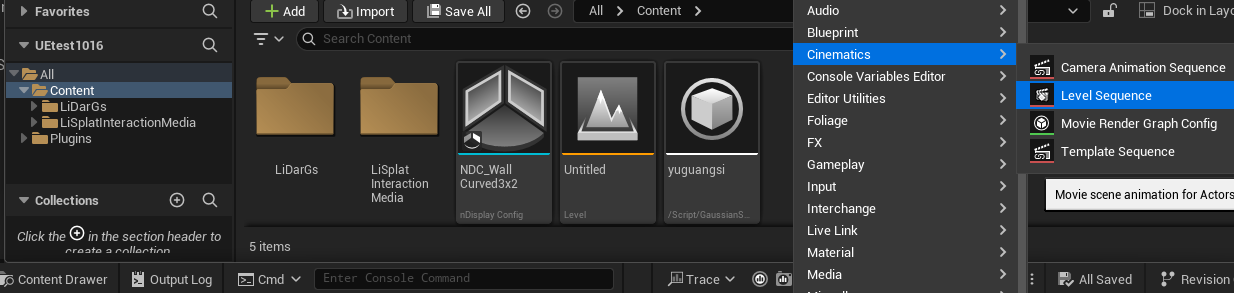 Figure: Create a Level Sequence
Set the Camera and Duration
- Click Create Camera in Sequencer to create a Cine Camera Actor in the sequence.
- Adjust its position and direction. For a moving camera, add Transform keyframes and check each part of the path.
- Set playback range, frame rate and end frame; for example, use 150 frames and adjust for the intended duration.
For more customization, see the Unreal Engine tutorial: Create Camera Animation.
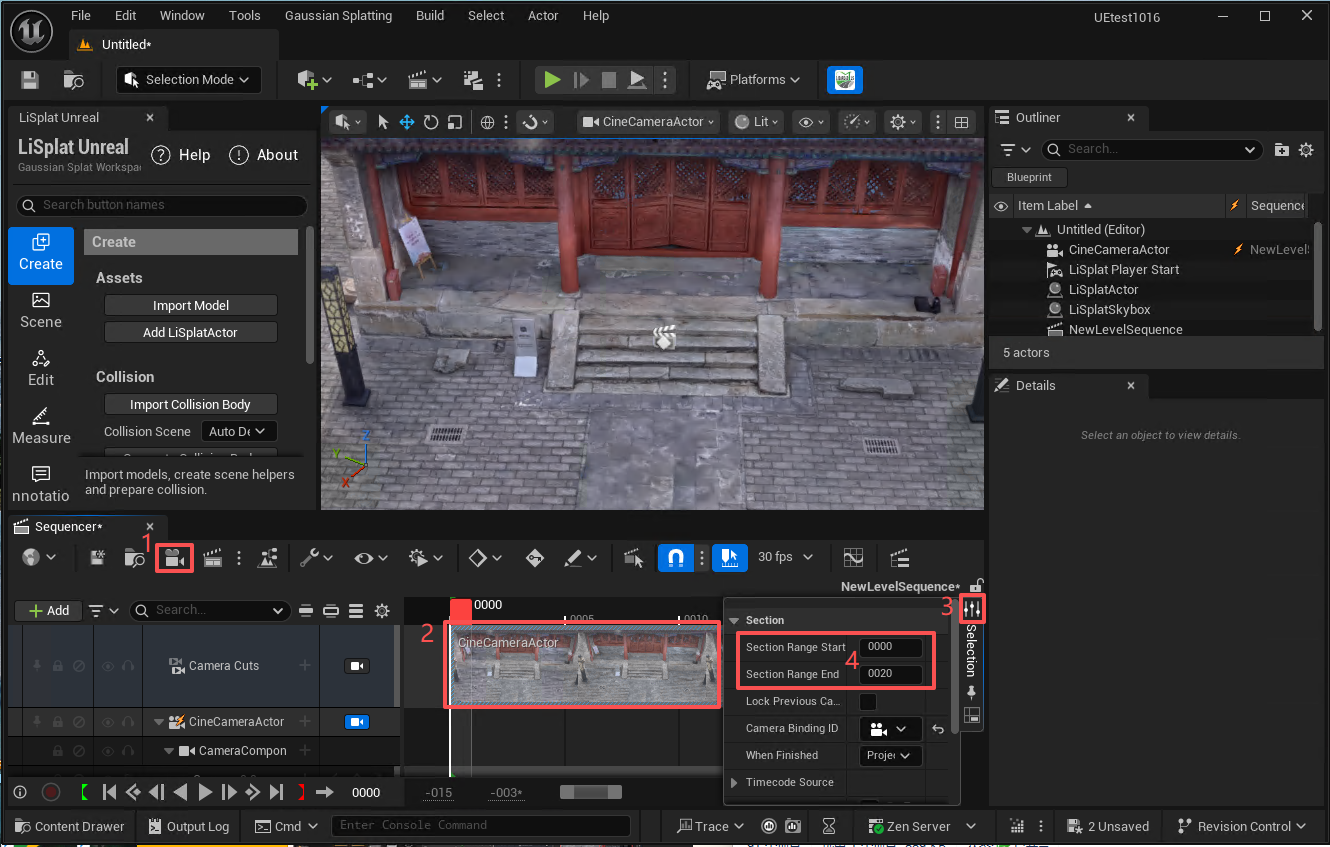 Figure: Create a camera and set the sequence range
Configure Panoramic Rendering
- Click Movie Render to open Movie Render Queue.
- Click Unsaved Config in the Settings column.
- Add Panoramic Rendering and disable the ordinary Deferred Rendering pass to avoid also outputting a regular view.
- In the panoramic settings, enable Allocate History Per Pane. Set output resolution, format and directory.
- Click Accept to return to the queue.
An equirectangular panorama normally uses a 2:1 aspect ratio. High resolution and per-pane history require more VRAM, so start by rendering a few frames.
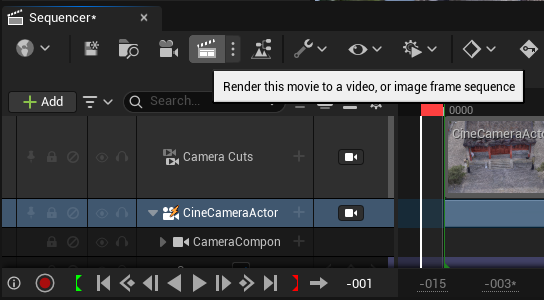 Figure: Open Movie Render Queue
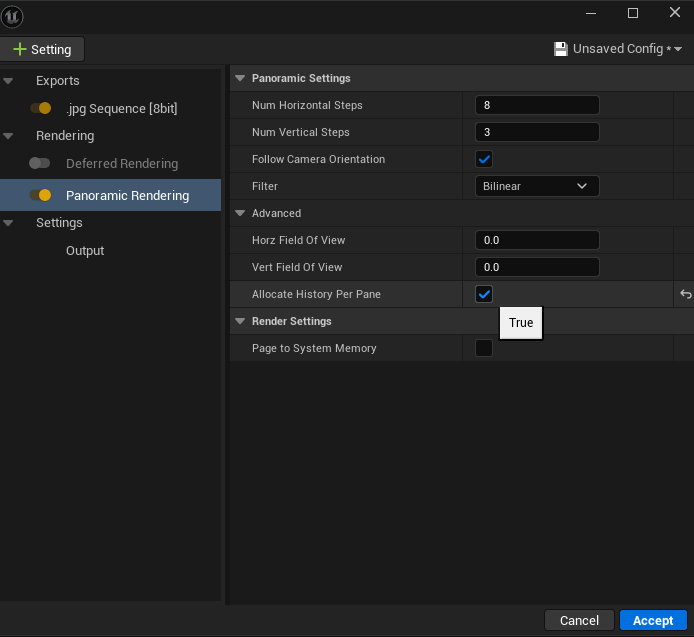 Figure: Panoramic rendering settings
Render and Inspect
Click Render Local. Open the output directory and check frame continuity, panorama seams and brightness stability.
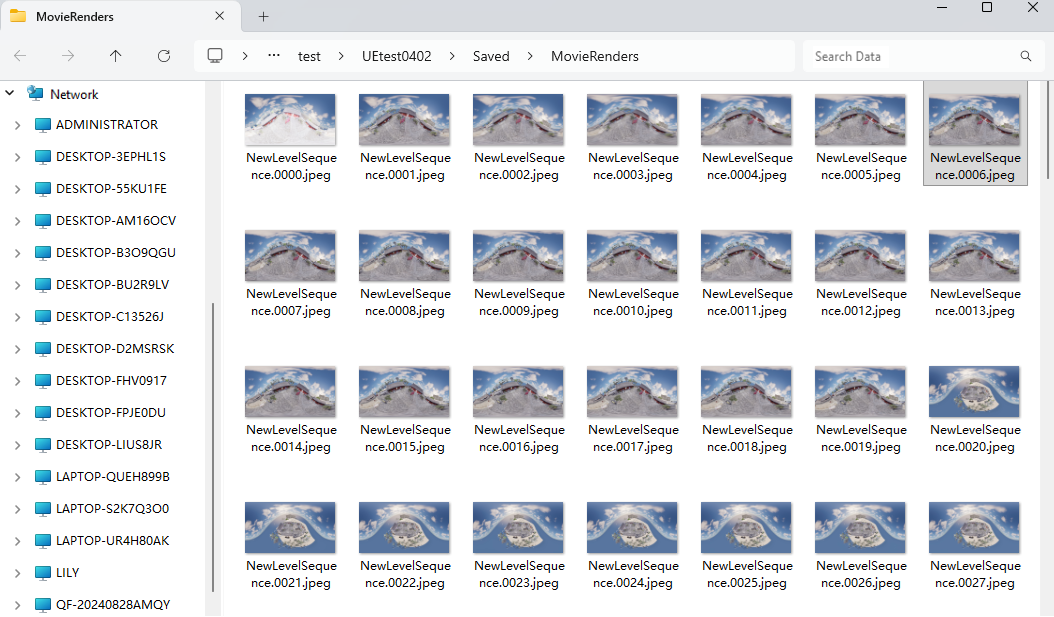 Figure: Exported panoramic image sequence
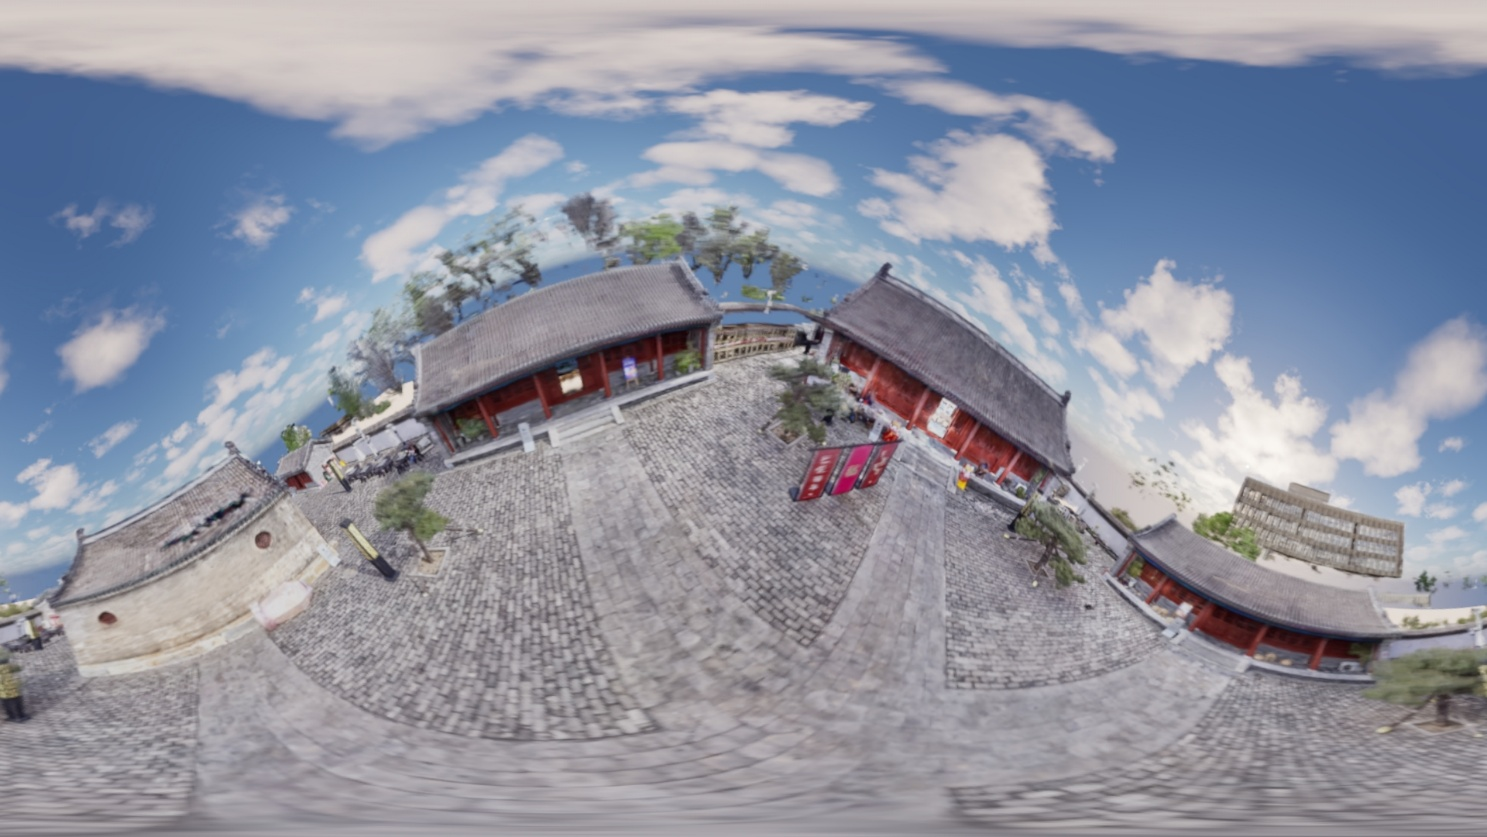 Figure: 360-degree panoramic result