
Project Packaging
Project packaging requires a C++ project. For Visual Studio installation, see Create a Project.
Prepare for Packaging
For project packaging, please use LiSplat Actors that have not been edited. Editing does not directly modify the data in the model file, so the current packaging workflow does not include those edits.
- Place the model file in the project's
Contentfolder, then import the data and add a LiSplat Actor. - Set the spawn point and save the level. Currently, packaging supports LiSplat Asset data only.
- Confirm that the corresponding LOD and collision data are present in
Content\LiDarGs.
To use an edited result, save it as a new data file, re-import it and replace the original Actor. Package using the new, unedited Actor.
Packaging Options
Open Edit → Project Settings → Project → Packaging and clear:
- Use Pak File
- Use Io Store
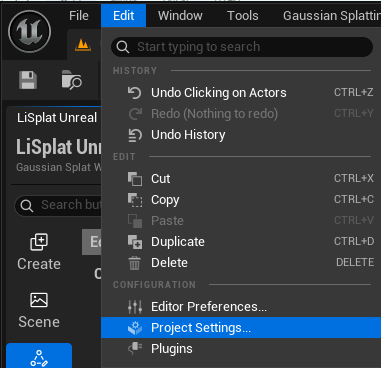 Figure: Open Project Settings
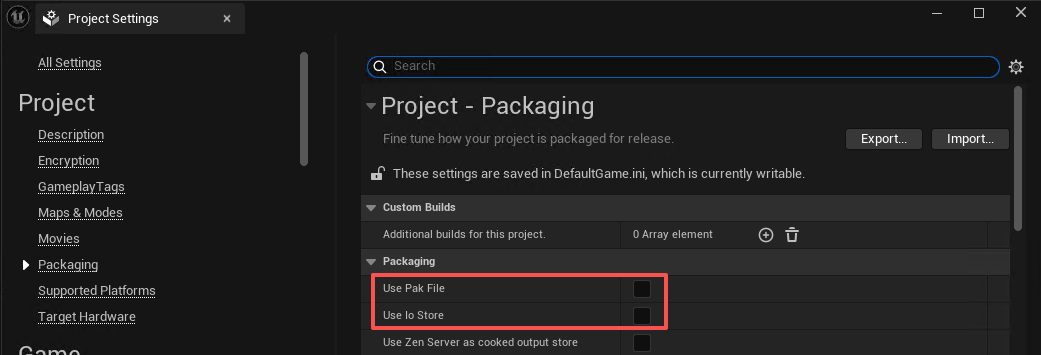 Figure: Clear the packaging options
Include Assets and Data Folders
Expand the advanced settings under Packaging. Add one entry to each setting below. Use the folder picker to select the project's Content\LiDarGs folder for both entries, so the application can read LOD and collision data.
| Setting | Folder to select |
|---|---|
| Additional Asset Directories to Cook | The project's Content\LiDarGs folder |
| Additional Non-Asset Directories to Package | The project's Content\LiDarGs folder |
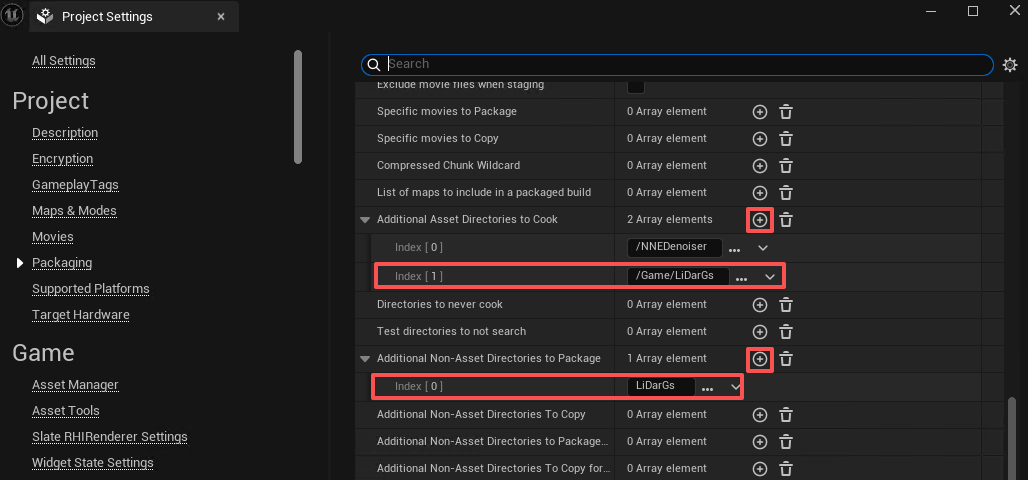 Figure: Add the LOD and collision data folder
Set the Default Map
Open Project Settings → Maps & Modes and set Game Default Map to the level to run.
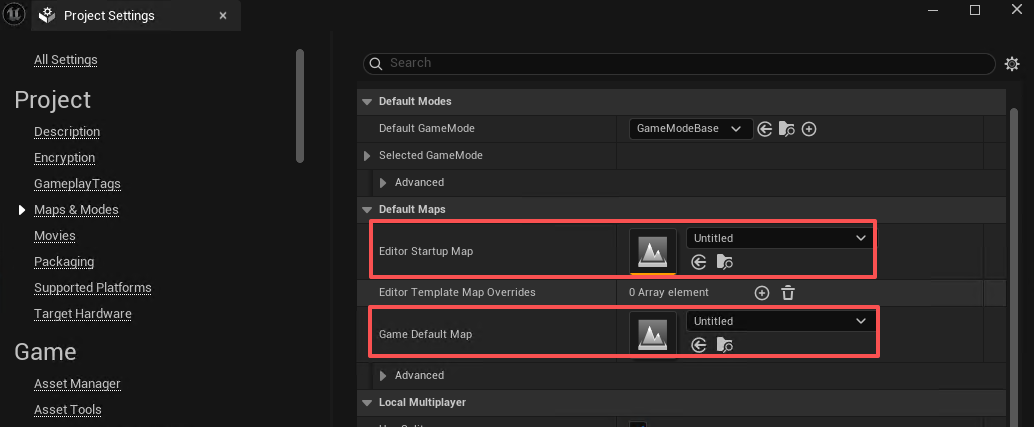 Figure: Set the default game map
Cook and Package
- On the main toolbar, choose Platforms → Windows → Cook Content.
- When cooking finishes, choose Platforms → Windows → Package Project.
- Select an output folder and wait for packaging to finish.
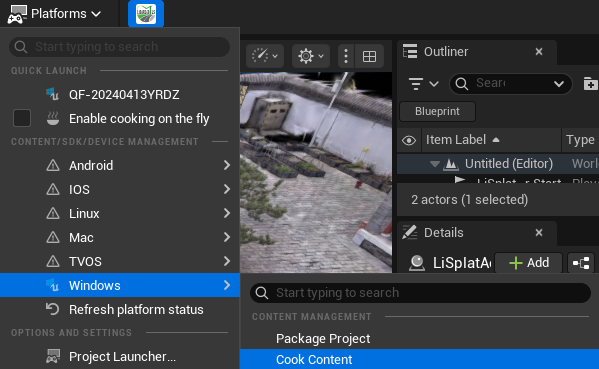 Figure: Cook Windows content
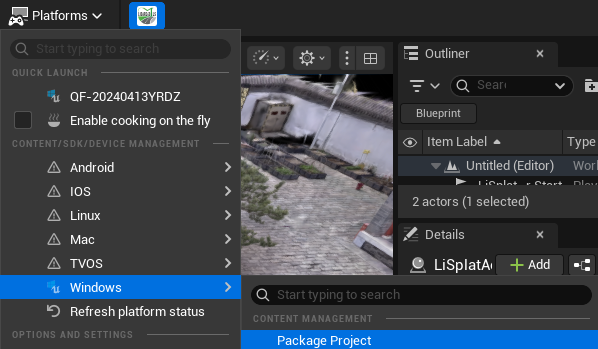 Figure: Package the Windows project
Run the Application
Double-click the output .exe to preview the running level. For mouse and keyboard controls, see Play Mode.
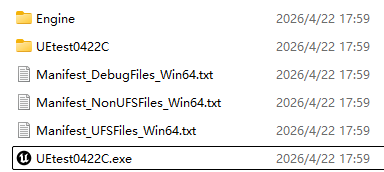 Figure: Packaged output folder